The topic of “Line of Flight” seems to be a mysterious, yet cool term that is often misused and/or misunderstood. As a freefly load organizer and instructor, I’ve realized the lack of knowledge about this subject so I figured we can take a moment and break it down:
Jump Run – the direction of flight and configuration of the plane while jumpers are exiting
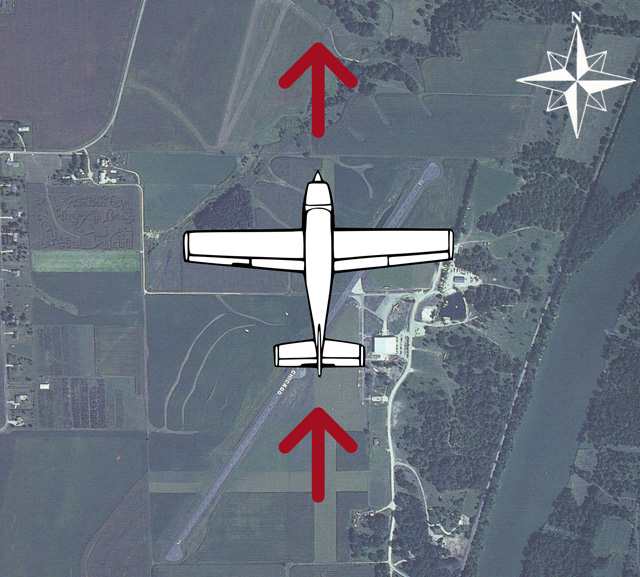
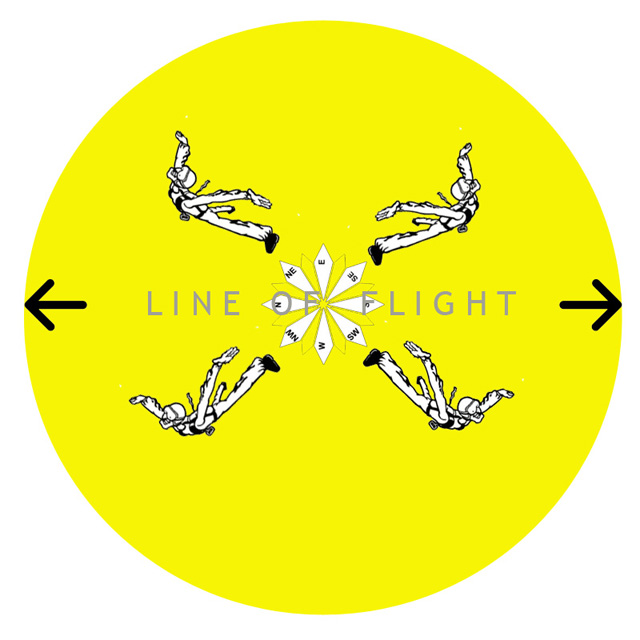
Line of Flight – The 3-dimensional profile of Jump Run
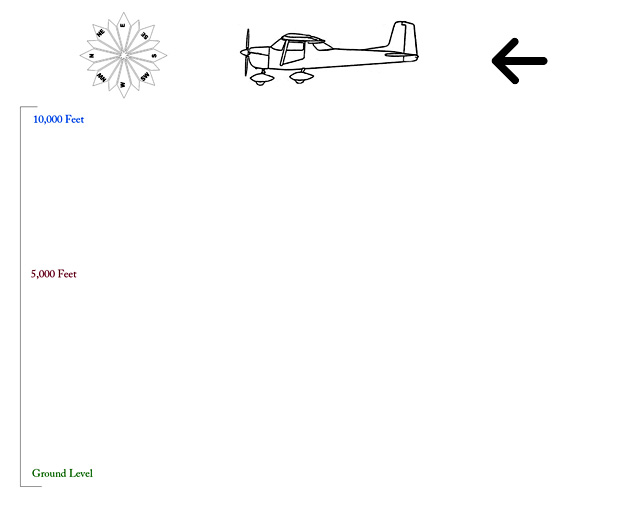
The Line of Flight is essentially the same “line” as Jump Run, however in skydiving, the Line of Flight is discussed in terms of three-dimensional space.
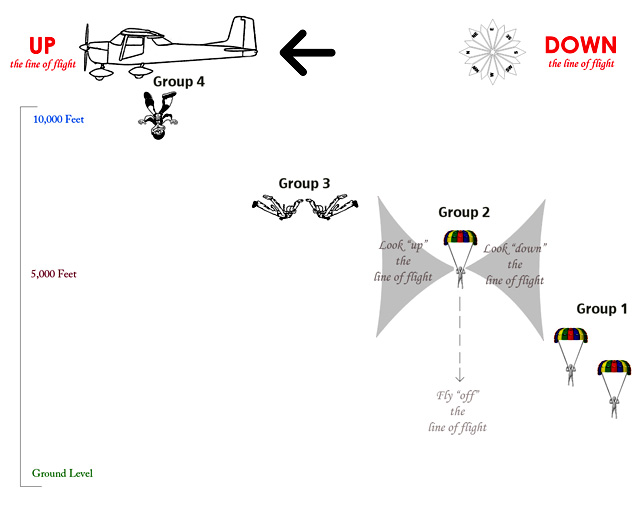
Next, where Jump Run begins (or the point where the first group exits) is known as “Down the Line of Flight” and where Jump Run ends (towards the last group exiting), is called, “Up the Line of Flight.”
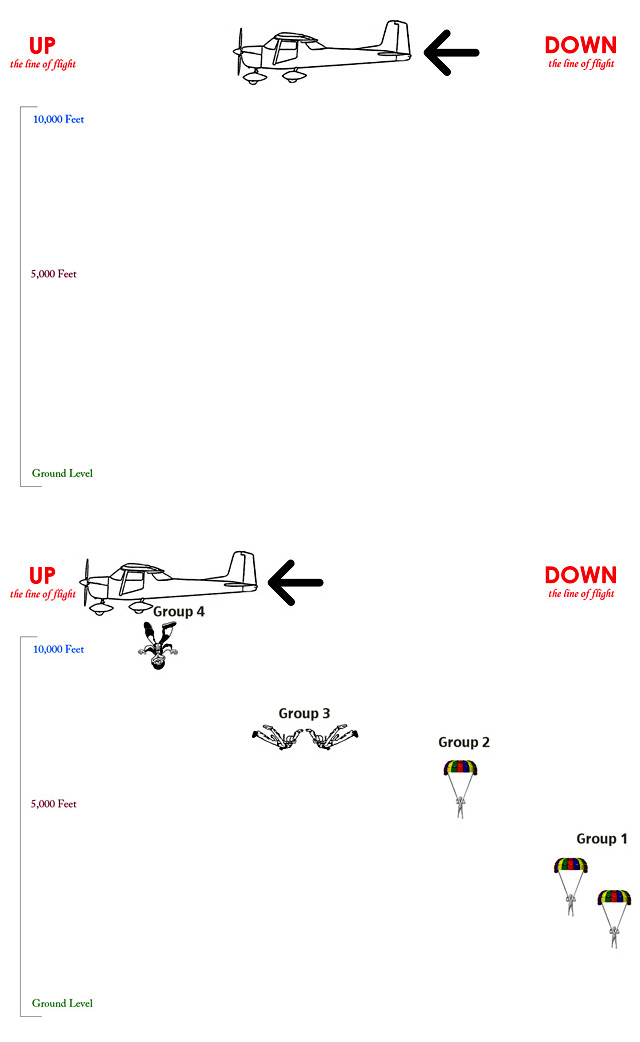
According to these illustrations, note the compass rose and which direction the plane is flying. You can determine that the plane is flying from the South, towards the North. This establishes Jump Run and Line of Flight.
So, what makes this “Line of Flight” important? To avoid collisions!!
Potential Collision Hazards
- Freefall Drifting (outside the given exit separation and given column of air)
- Break-Off & Opening
- Canopy Opening and the First 10-15 seconds
On every jump, in any axis, we all experience freefall and canopy drift. (Reference http://www.melissaairheart.com/winds-aloft/) Therefore, pre-planning the spot, Jump Run, Exit Order (reference http://www.melissaairheart.com/exit-order-of-business/), and Exit Separation (reference http://www.melissaairheart.com/exit-separation-time-really-matters/) turn out to be important elements of safety for Line of Flight.
Taking into consideration the day’s Jump Run, the Exit Order for the load and Exit Separation for the day’s conditions, each group (assuming they are a traditional RW, Freefly, student or Tandem group) is given a “Column of Air” for freefall. If a group is moving towards the boundaries of their given column, there now exists a potential for a collision.

How does one get towards the boundaries of the column if they exited in the right Exit Order and given the appropriate Exit Separation?
Example 1: New Freeflier
Freefly speeds are increased from 120mph to roughly 150mph. Typically, new sit flyers have a tendency to lean forward which causes a dramatic backslide, which can cover a great distance. If that jumper is facing Up or Down the Line of Flight, they are increasing their chances of converging with another group.
A solution is to have newer freefliers identify themselves in the loading area, and let others know they’ll be taking the Line of Flight into consideration. Then make sure to face perpendicular to the Line of Flight during freefall.
Example 2: Break-Off
To avoid collision on break off, it is suggested to track perpendicular to the Line of Flight.
Let’s say there is one 4-way RW group (no video), and three 2-way freefly groups exiting from a caravan – given Exit Separation 6 seconds, Jump Run South to North, and each group exited appropriately. To assure avoiding running into groups, the 2-way freefliers are able to track perpendicular to the Line of Flight, allowing more separation between themselves and the other groups.
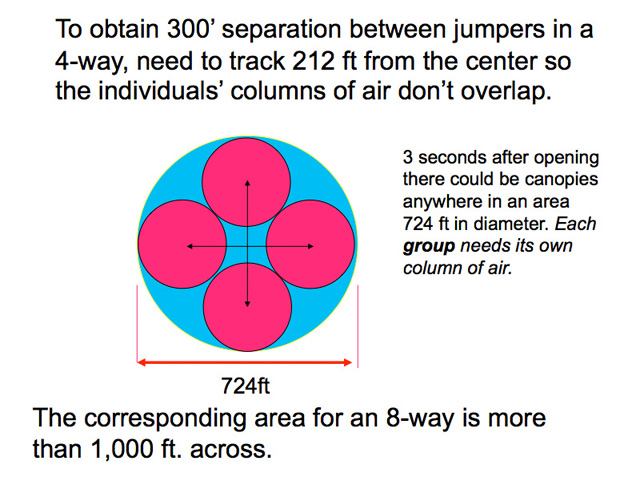
However, in a 4-way or larger, inevitably, part of the group may track Up and Down the Line of Flight. There are 3-options to this variable:
1: The 2-jumpers tracking Up or Down the Line of Flight may reduce their tracking speed so as not exit their Column boundaries, yet still gaining an appropriate distance; and the 2-jumpers tracking off the Line of Flight do a max track to assist in maximizing group separation
2: The 4-way could adjust their break-off and off-set their trajectory by at least 45° so as to break-off, off the Line of Flight
3: The group exiting after a group of 4 (or more), leave a little extra time before exiting to account for enlarging the Column of airspace for the previous group’s need space for break off
[Larger groups will absolutely need more time between groups to account for a larger distance covered on their break-off.]
Note: Angled, tracking and wingsuit groups are exceptions to the “Column of Air” example as they fly in a broader airspace and need special consideration for their flight paths. This requires communication and awareness from the entire load, including the pilot.
Why is Line of Flight important for canopy?
Example 1: Canopy’s Flight Path
The canopy’s forward movement after opening still increases the distance towards the boundaries of the prior or previous group’s Column of Air.

Therefore, after ensuring a functioning canopy, it’s important to fly OFF the Line of Flight for approximately 10-15 seconds after opening. In theory, you should be able to look Up the Line of Flight and see the group after you breaking off or just opening; and look Down the Line of Flight and identify the group Down the Line of Flight under canopy and slightly below (depending on opening altitudes).
Example 2: Landing Area and Opening Point
This will vary depending on Jump Run’s direction, surface winds, freefall drift, etc. However, if the landing Target Area is under Group 3 shown in the next Illustration, then Group 1 and 2 will have to fly Up the Line of Flight. If you find yourself in Group 1 or 2’s situation, fly off the Line of Flight and identify the groups that exited after you before you fly to the the Holding Area and Landing Pattern.
Try this at home:
1. Figure out Line of Flight (or Jump Run) for the day’s conditions and identify landmarks for specific directions
2. Make sure you note if your group is drifting up or down the Line of Flight; then assure you track accordingly
3. After deployment and opening checks, fly your canopy off the Line of Flight (if safe to do so) for 10-15 seconds.
4. Identify a safe flight path to Holding Area and Landing Pattern
Another great resource is USPA’s Power Point presentation on “Canopy Collisions” found here http://www.uspa.org/USPAMembers/Downloads/tabid/84/Default.aspx (scroll towards bottom, under “Miscellaneous” topics.
There are always exceptions to the norm and many variables. Therefore, maintain awareness and use your best judgement in each situation.
Note: If this does not make sense, please consult an instructor at your Drop Zone for further explanation. This is not meant to be a sole training tool for skydiving or parachute flying. Full instructional methods will be provided at your skydiving school.
Drawings are not to scale

Join the conversation
You can post now and register later. If you have an account, sign in now to post with your account.
Note: Your post will require moderator approval before it will be visible.