

Deleted
-
Content
0 -
Joined
-
Last visited
Never -
Feedback
N/A
Everything posted by Deleted
-
canadagoose canada goose canada goose parka canada goose jackets goose down snow mantra canada goose canada goose snow mantra parka parka women canada goose womens chilliwack parka canada goose chilliwack parka. Other About goose blog goose About pickcanadagoose.com blog
-
[url=http://www.nicepandora.com/]pandora sale[/url] [url=http://www.allpandorasets.com/]pandora sets[/url] [url=http://www.onlinepandoracompany.com/]cheap pandora[/url] [url=http://www.buydiscountpandora.com/]discount pandora[/url] [url=http://www.pandoraonlineco.com/]buy pandora[/url] Wholesale Pandora Inlaid Stone Beads PIS-1006 [2838] - $12.83 : Shopping Cart[url=http://www.nicepandora.com/wholesale-pandora-inlaid-stone-beads-pis1006-p-1643.html] [img]http://www.nicepandora.com/includes/templates/pandora/images/shippingcart.jpg[/img]Powered by Zen Cart :: The Art of E-Commerce[/url] [url=http://www.nicepandora.com/index.php?main_page=login]Log In[/url]|[url=http://www.nicepandora.com/index.php?main_page=create_account]Create an Account[/url]|[url=http://www.nicepandora.com/index.php?main_page=account]My Account[/url]|[url=http://www.nicepandora.com/index.php?main_page=advanced_search]Advanced Search[/url] [url=http://www.nicepandora.com/] [img]http://www.nicepandora.com/includes/templates/pandora/images/logo.jpg[/img]Powered by Zen Cart :: The Art of E-Commerce[/url] [url=http://www.nicepandora.com/index.php]Home[/url]| [url=http://www.nicepandora.com/index.php?main_page=products_all]All Products[/url]| [url=http://www.nicepandora.com/pecials.html]Specials Products[/url]| [url=http://www.nicepandora.com/index.php?main_page=Payment_Methods]Payment Methods[/url]| [url=http://www.nicepandora.com/index.php?main_page=FAQ]FAQ[/url]| [url=http://www.nicepandora.com/index.php?main_page=shippinginfo]Shipping Info[/url]| [url=http://www.nicepandora.com/index.php?main_page=contact_us]Contact Us[/url] US Dollar Euro GB Pound Canadian Dollar Australian Dollar CNY Categories [url=http://www.nicepandora.com/free-gift-zone-c-17.html]Free gift zone[/url] [url=http://www.nicepandora.com/pandora-bangles-c-2.html]Pandora Bangles[/url] [url=http://www.nicepandora.com/pandora-bracelets-c-1.html]Pandora Bracelets[/url] [url=http://www.nicepandora.com/pandora-diy-c-18.html]Pandora DIY[/url] [url=http://www.nicepandora.com/pandora-earrings-c-15.html]Pandora Earrings[/url] [url=http://www.nicepandora.com/pandora-necklaces-c-6.html]Pandora Necklaces[/url] [url=http://www.nicepandora.com/pandora-packages-c-16.html]Pandora Packages[/url] [url=http://www.nicepandora.com/pandora-sets-c-14.html]Pandora Sets[/url] [url=http://www.nicepandora.com/pandora-alphabet-beads-c-8.html]Pandora Alphabet Beads[/url] [url=http://www.nicepandora.com/pandora-antique-silver-charms-c-5.html]Pandora Antique Silver Charms[/url] [url=http://www.nicepandora.com/pandora-bead-with-stone-c-3.html]Pandora Bead with Stone[/url] [url=http://www.nicepandora.com/pandora-enamel-silver-charms-c-13.html]Pandora Enamel Silver Charms[/url] [url=http://www.nicepandora.com/pandora-gold-plated-charms-c-7.html]Pandora Gold Plated Charms[/url] [url=http://www.nicepandora.com/pandora-murano-glass-beads-c-11.html]Pandora Murano Glass Beads[/url] [url=http://www.nicepandora.com/pandora-silver-beads-c-4.html]Pandora Silver Beads[/url] [url=http://www.nicepandora.com/pandora-silver-clip-c-12.html]Pandora Silver Clip[/url] [url=http://www.nicepandora.com/pandora-silver-dangle-beads-c-9.html]Pandora Silver Dangle Beads[/url] [url=http://www.nicepandora.com/pandora-silvergold-charms-c-10.html]Pandora Silver&Gold Charms[/url] [url=http://www.nicepandora.com/]Home[/url] :: [url=http://www.nicepandora.com/pandora-murano-glass-beads-c-11.html]Pandora Murano Glass Beads[/url] :: Wholesale Pandora Inlaid Stone Beads PIS-1006 [url=http://www.nicepandora.com/wholesale-pandora-inlaid-stone-beads-pis1006-p-1643.html] [img]http://www.nicepandora.com/images/l/Wholesale%20Pandora%20Inlaid%20Stone%20Beads%20PIS-1006.jpg[/img]Wholesale Pandora Inlaid Stone Beads PIS-1006[/url] Wholesale Pandora Inlaid Stone Beads PIS-1006 $12.83 Add to Cart: Free Packaging ! 24 Hours Shipping. 100% High Quality & Authentic Guarantee. Product Description Quality Pandora Jewelry, a unique collection of Bracelets, Necklaces, Beads and Murano Glass that will inspire you to make your own modern jewelry part together.Take a look at our offer and be inspired! Monthly Specials For November [url=http://www.nicepandora.com/pandora-necklacebracelet-set-pnb1015-p-1128.html] [img]http://www.nicepandora.com/images/s/T1_ktYXkxaXXaRBLw1_045461131.jpg[/img]Pandora Necklace&Bracelet Set PNB-1015[/url][url=http://www.nicepandora.com/pandora-necklacebracelet-set-pnb1015-p-1128.html]Pandora Necklace&Bracelet Set PNB-1015[/url]$196.60 $60.39Save: 69% off [url=http://www.nicepandora.com/pandora-necklacebracelet-set-pnb1009-p-1122.html] [img]http://www.nicepandora.com/images/s/T1c9N5Xl4cXXb3LYZU_01327477.jpg[/img]Pandora Necklace&Bracelet Set PNB-1009[/url][url=http://www.nicepandora.com/pandora-necklacebracelet-set-pnb1009-p-1122.html]Pandora Necklace&Bracelet Set PNB-1009[/url]$196.60 $60.39Save: 69% off [url=http://www.nicepandora.com/pandora-necklacebracelet-set-pnb1011-p-1124.html] [img]http://www.nicepandora.com/images/s/T1c9N5Xl4cXXb3LYZU_0137422116.jpg[/img]Pandora Necklace&Bracelet Set PNB-1011[/url][url=http://www.nicepandora.com/pandora-necklacebracelet-set-pnb1011-p-1124.html]Pandora Necklace&Bracelet Set PNB-1011[/url]$196.60 $60.39Save: 69% off [url=http://www.nicepandora.com/pandora-necklacebracelet-set-pnb1013-p-1126.html] [img]http://www.nicepandora.com/images/s/T1_ktYXkxaXXaRBLw1_041131.jpg[/img]Pandora Necklace&Bracelet Set PNB-1013[/url][url=http://www.nicepandora.com/pandora-necklacebracelet-set-pnb1013-p-1126.html]Pandora Necklace&Bracelet Set PNB-1013[/url]$196.60 $60.39Save: 69% off [url=http://www.nicepandora.com/pandora-necklacebracelet-set-pnb1014-p-1127.html] [img]http://www.nicepandora.com/images/s/T1GY8YXaNAXXcrj0_V_020255.jpg[/img]Pandora Necklace&Bracelet Set PNB-1014[/url][url=http://www.nicepandora.com/pandora-necklacebracelet-set-pnb1014-p-1127.html]Pandora Necklace&Bracelet Set PNB-1014[/url]$196.60 $60.39Save: 69% off [url=http://www.nicepandora.com/pandora-necklacebracelet-set-pnb1008-p-1121.html] [img]http://www.nicepandora.com/images/s/T1c9N5Xl4cXXb3LYZU_013746.jpg[/img]Pandora Necklace&Bracelet Set PNB-1008[/url][url=http://www.nicepandora.com/pandora-necklacebracelet-set-pnb1008-p-1121.html]Pandora Necklace&Bracelet Set PNB-1008[/url]$196.60 $60.39Save: 69% off [url=http://www.nicepandora.com/pandora-necklacebracelet-set-pnb1016-p-1129.html] [img]http://www.nicepandora.com/images/s/Pandora%20Necklace%20and%20Bracelet%20Set%20PNB-1016.jpg[/img]Pandora Necklace&Bracelet Set PNB-1016[/url][url=http://www.nicepandora.com/pandora-necklacebracelet-set-pnb1016-p-1129.html]Pandora Necklace&Bracelet Set PNB-1016[/url]$196.60 $60.39Save: 69% off [url=http://www.nicepandora.com/pandora-necklacebracelet-set-pnb1010-p-1123.html] [img]http://www.nicepandora.com/images/s/T1JCF5XmddXXaisssU_014121.jpg[/img]Pandora Necklace&Bracelet Set PNB-1010[/url][url=http://www.nicepandora.com/pandora-necklacebracelet-set-pnb1010-p-1123.html]Pandora Necklace&Bracelet Set PNB-1010[/url]$196.60 $60.39Save: 69% off [url=http://www.nicepandora.com/index.php?main_page=tell_a_friend&products_id=1643] [img]http://www.nicepandora.com/includes/templates/pandora/buttons/english/button_TellAFriend.gif[/img]Tell a Friend[/url] [url=http://www.nicepandora.com/index.php?main_page=product_reviews_write&products_id=1643] [img]http://www.nicepandora.com/includes/templates/pandora/buttons/english/button_write_review.gif[/img]Write Review[/url] [url=http://www.nicepandora.com/index.php?main_page=Wholesale]Wholesale | [/url] [url=http://www.nicepandora.com/index.php?main_page=contact_us]Contact Us | [/url] [url=http://www.nicepandora.com/index.php?main_page=shippinginfo]Shipping Info | [/url] [url=http://www.nicepandora.com/index.php?main_page=Payment_Methods]Payment Methods | [/url] [url=http://www.nicepandora.com/index.php?main_page=privacy]Privacy | [/url] [url=http://www.nicepandora.com/index.php?main_page=FAQ]FAQ | [/url] [url=http://www.nicepandora.com/index.php?main_page=conditions]Conditions of Use | [/url] [url=http://www.nicepandora.com/index.php?main_page=Coupons]Coupons[/url] Copyrights 2009 © [url=http://www.nicepandora.com/index.php]Cheap Pandora Necklaces[/url],[url=http://www.nicepandora.com/index.php]Cheap Pandora Bracelets[/url],[url=http://www.nicepandora.com/index.php]Cheap Pandora Jewelry[/url] by [url=http://www.nicepandora.com/index.php]pandora[/url] All Rights Reserved. [url=http://www.nicepandora.com/wholesale-pandora-inlaid-stone-beads-pis1006-p-1643.html][/url] [url=http://www.nicepandora.com/]Cheap Pandora Necklaces[/url] [url=http://www.nicepandora.com/]Cheap Pandora Bracelets[/url] [url=http://www.nicepandora.com/]Cheap Pandora Jewelry[/url] [url=http://www.nicepandora.com/free-gift-zone-c-17.html]Free gift zone[/url] [url=http://www.nicepandora.com/free-gift-zone-c-17.html]Cheap Pandora Jewelry[/url] . You ought to be constructs words with your advertisements which will lead the objective audience that you're directly speaking to them to allow a meaning of familiarity within your services. Whenever you persuade the folks by calling for him or her and directing the property to buy or entail ones services, they furnish importance for your business engagement.Your low-priced internet-based flag advertising will end up one of the many sought to get ads you will discover. Ensure you present your current ads towards the global society repeatedly for getting them comfortable with you your services. Always keep in mind that using a website will not mean it could actually sell products without treatment [url=http://www.jvideoz.com/user/12955/catharinebessle/blog] Other About sale blog [/url] [url=http://www.polisblog.it/user/roseannehannifa] sale [/url] [url=https://www.supplylink.com/users/buffalonfl?quicktabs_2=2] About nicepandora.com blog [/url]
-
[url=http://www.newswisswatch.com/ebel-classic-wave-Classical-Watches-c-361_363.html]ebel wave[/url] [url=http://www.newswisswatch.com/ebel-classic-wave-Classical-Watches-c-361_363.html]ebel sportwave[/url] [url=http://www.newswisswatch.com/ebel-classic-wave-Classical-Watches-c-361_363.html]ebel sport[/url] [url=http://www.newswisswatch.com/ebel-classic-wave-Classical-Watches-c-361_363.html]ebel mini[/url] [url=http://www.newswisswatch.com/ebel-classic-wave-Classical-Watches-c-361_363.html]ebel furniture[/url] [url=http://www.newswisswatch.com/ebel-classic-wave-c-361_363.html]ebel wave[/url] [url=http://www.newswisswatch.com/ebel-classic-wave-c-361_363.html]ebel furniture[/url] [url=http://www.newswisswatch.com/ebel-classic-wave-c-361_363.html]ebel sport[/url] [url=http://www.newswisswatch.com/ebel-classic-wave-c-361_363.html]ebel mini[/url] [url=http://www.newswisswatch.com/ebel-classic-wave-c-361_363.html]ebel sportwave[/url]. [url=http://blog.tunerzedge.com/?page_id=117] Other About furniture blog [/url] [url=http://wukyanos.net/pg/blog/pkeivan] furniture [/url] [url=http://www.frnzchat.com/meet@frnzchat/m/wall/rss/bybeatsmonster/] About newswisswatch.com blog [/url]
-
[url=http://www.uggbootssuper.com/]ugg[/url] [url=http://www.uggbootssuper.com/]ugg boots[/url]A produce market is once the stock markets falls a great extended stretch of time. The fall is often around 20% and it is the opposite of any bull advertise. A produce market is a result of the become less popular in inventory prices that are directly influenced by a decrease inside company sales. Falling stock prices can even be a static correction of through valued keep. When options and stocks become to help you expensive they may eventually fall to some more affordable price. The decline currency markets is further more perpetuated by means of scared investors who will sell their particular stocks at the first warning sign of lower stock prices along with the cycle keeps. [url=http://www.uggbootssuper.com/]ugg boots sale[/url]For situation the endure market at the time of thw 1970s went on for spanning a decade any time stocks resolved to go sideways. It turned out experiences like this which cause people to move clear of day and additionally active investing into much more low associated risk investments. This can be when this popularity from bonds plus mutual financial resources began. A bear market may cause your securities to shed in fee. The loss of their value can happen extremely immediately or gradually over time. Both bring about the exact conclusion that your quote value of any stock is usually lower. [url=http://www.uggbootssuper.com/]ugg boots stroe[/url]On the other hand, a display market is merely bad should you plan at selling the stock at once or you only need the funds. Investments are really meant to be long name. If stocks and options prices slide all you want to do is wait to allow them to increase repeatedly. In fact bear economies, falling share prices, and depressive markets are essential to that success of the long run investor. Bear markets offer a way to buy less expensive stocks. Should you have the power, financial foundation, and that patience to wait a decade and up for the profit, bear markets can be extremely important to you. [url=http://www.uggbootssuper.com/]ugg boots online[/url]Financial advisors will usually tell its clients to market their carries when industry prices show up but this is clearly an unsatisfactory move. Financial counselor usually offer these kinds of advice so that you can appease a investor inquiries and uphold their very own reputation. In other word money experts are not aware of everything, use your judgment. Investing money in a produce market is not rocket scientific discipline but it is usually tricky. You'll want to look to get companies and additionally funds that have the upcoming potential to build you money 18 years from today. This is hard to do, since long term predictability is impossible. [url=http://www.uggbootssuper.com/kids-ugg-boots-c-46.html]Kids UGG Boots[/url]On the other hand, you can use common awareness. Gillette electric shavers and diet coke product keep may are unsuccessful 40% today down the road people are still going to shop for both. Giving her a very point here's to not to ever couple commodity price by means of business. Must be stock rate falls doesn't mean that your company will resort under. As mentioned above it might be a stock trading game correction. If you possibly could take some sort of deep breath and have absolutely confidence you can expect to realize that your chosen bear advertise and dropping stock prices is a great thing. It can be like clearance sale on options and stocks, and quickly companies which were through your reach can be afforded. [url=http://www.uggbootssuper.com/ugg-slippers-boots-c-4.html]buy ugg slippers[/url]Everything inside universe such as the stock market can get and sustain balance - thus carrying those dropping stocks back off to reasonable price. You can certainly plan a comedian ski vacation whether or not no you knows the best way to ski. You can certainly learn the game while on a break and have a lot of fun. You does not need to know a single thing about facts before you're free to the lodge because everything will likely be available there. All of the knowledge you absolutely need and each of the necessary machines is area of a snowboard package. You'll be skiing during an hour connected with beginning ones instruction. [url=http://www.uggbootssuper.com/ugg-cable-knit-boots-c-62.html]ugg cable knit outlet[/url] It's relatively simple learn to help ski. Most resorts give a ski school over their building, with instructions being affordable. There really are both crew and secret lessons displayed most places to stay. You really should schedule a date for lessons prior to arrive for the resort, nevertheless. This technique, yo will make sure that you will start your facts lessons instantly. Most instructors start with showing you how to handle your machines. [url=http://www.uggbootssuper.com/ugg-corinth-boots-c-65.html]ugg corinth boots outlet[/url]You would be tilted front slightly remember when you are wearing skiing boots, so walking within them the very first time is rather awkward. You're going to get the hang than it rapidly, though simply just walk together with your knees leaning slightly. Your primary skiing maneuver would be the plow, or even snow plow. This technique requires for which you literally benefit from your skis such as a plow. The back on the skis carefully moves external and off your body system via the use of pressure. Its this that stops people. [url=http://www.uggbootssuper.com/ugg-adirondack-boots-c-79.html]buy ugg adirondack[/url]You can certainly guide by yourself on skis by means of bending any knees and next leaning available as one direction or perhaps another. How you lean will depend on which way you must go. These techniques could be learned for about 60 minutes, even if you have had never skied that you saw. Among the great reasons for having skiing is certainly that upon having learned all the snowplow tactic and the best way to guide oneself, you will be ready to hit all the slopes. Get on the skiing lift, continue up all the mountain, and check out what you could have learned. When you feel at ease enough to get faster, draw all the skis in from all the snow plow job, then thrust them returning out to manage your acceleration. Since you are just start to learn this online game, you should continue to trails intended for beginners. For the most part ski places to stay the trainee trails happen to be marked accompanied by a green symbol. Generally, trails marked with blue usually are for more advanced skiers. Following a day at the beginner hiking trails, you may very well be ready to utilise on the hands down. Black hiking trails are just for experts and can be quite dangerous people who do dont you have the skills to manage them. You need to avoid schokoh?utige trails if you do not have had a lot of workout and working experience. You will probably know remember when you are ready make use of these road!. [url=http://www.coloradohomesiq.com/blog/market-update-for-piney-creek-in-aurora-co/share.html] Other About boots blog [/url] [url=http://www.indiamoverpacker.com/blog/index.php] boots [/url] [url=http://www.ems1.com/profile/] About uggbootssuper.com blog [/url]
-
buy swarovski cheap swarovski buy swarovski swarovski crystal swarovski online 925 sterling silver ring silver ring on the ring couple vows female angel ring [zi790575] - $61.98 : US Dollar CNY Euro GB Pound Canadian Dollar Australian Dollar Currency: Log In or Register Home Swarovski Sets All Swarovski Shipping Info FAQ Contact Us Shopping Cart Categories Swarovski Necklaces Swarovski Sets Swarovski Rings Swarovski Earrings Swarovski Bracelets Swarovski Charms Swarovski Brooches Swarovski Beads Swarovski Pendants Swarovski Bangles Fashion Accessories New Products - more Swarovski Charms 6866cross-blue color$82.36 $31.98 Save: 61% offSwarovski Charms 6866Cross-Black$70.30 $23.98 Save: 66% offSwarovski Charms 6860 black frosted cross-38x29mm$80.87 $29.98 Save: 63% off Home :: Swarovski Rings :: 925 sterling silver ring silver ring on the ring couple vows female angel ring 925 sterling silver ring silver ring on the ring couple vows female angel ring larger image $145.39 $61.98 Save: 57% off Model: zi790575 Add to Cart: Name: 925 sterling silver ring silver ring on the ring couple vows female angel ringWe provide many various kinds of rings here; you can choose any type as you like. All of them are made of high-qualified crystals. With exquisite craftsmanship, these rings are appropriate for fashionable female at any age. Crystal rings express your crystal-like heart. Just to be a fashionable woman!Inventory: In StockManufacturer: Swarovski CrystalCategory: Swarovski Rings Products Images Home Shipping Wholesale Privacy Order Tracking Coupons Conditions of Use FAQ Payment Methods Contact Us ©2011 swarovski. All Rights Reserved. Fashion Accessories swarovski charms swarovski cross necklaces swarovski cross pendants swarovski crystals wholesale .Jewelers should let you know whether that colored pearls are generally naturally colored, dyed and also irradiated. Clams, oysters, mussels and several other mollusks by using limy covers are able to produce pearls.But not many kinds render gem pearls regarding jeweler's good quality.The pearl is definitely an abnormal improvement of mother-of-pearl, or even nacre, imbedded within the soft bodies of shellfish.It's built right up, layer with layer, just as as nacre is added onto the lining of your growing spend and always comes with the same color choice and luster.For illustration, over the land, hundreds regarding good-sized pearls are normally found each year while in the oysters we eat.Unfortunately these don't have commercial value whether or not they are already cooked or possibly not since they're dull opaque white colored or purple much like the shell with the parent oyster Other About swarovski blog swarovski About swarovskionline.org blog
-
[url=http://www.superthenorthface.com/]northface[/url][url=http://www.superthenorthface.com/]the north face[/url]Maui hosts over 20 playing golf courses and features been named the international premier place for playing golf. Many of this golf courses in the island usually are ranked on the top bar or near to the top re all of your other courses on the globe. Throughout Maui, you'll be able to enjoy several professional competitions, but almost always there is space regarding non-professionals over the course. You will not likely have any problem getting a good tee time to get a leisurely activity with friends. Maui golf programs are outstanding for rivalling, enjoying a sport of playing, or only just learning this online game and obtaining some excitement. [url=http://www.superthenorthface.com/]north face outlet[/url]Below one can find a set of many of the most popular courses for the island. Your Bay Course Designed by Arnold Palmer together with Francis Duane, the Gulf Course is considered one of three Shining courses that will be owned by way of Kapalua Lodge. The Bay Course is often a par 72 course that will spans 6, 800 yards. Good, beautiful vegetables and moving fairways get this to course a new pleasure to help you play. Your Bay Program has 68 bunkers, 8 normal water hazards, and also a breathtaking fifth hole that will rests around the edge from the Pacific. Your Plantation Course The Plantation Course hosts the Mercedes World-class, which stands out as the championship in which opens your PGA travel season. [url=http://www.superthenorthface.com/]northfaces sale[/url]You can enjoy different terrains on this subject course, via deep valleys in order to large, increasing greens as well as fairways. The Plantation Course is often a par 73 training course that covers 7, 411 meters. Wailea Blue The Wailea White course is on the lower foothills within the majestic Mt. Haleakala. Designed by Arthur Jack port Snyder, this product spans 6, 765 yards while offering family estimates. You will discover serene ponds, coral stone dust bunkers, along with cooling fountains. [url=http://www.superthenorthface.com/]the north face jacket[/url]You can view stunning scenery within the sparkling ocean and also the dramatic volcano on the nearby extended distance. Wailea Emerald The Wailea Emerald green course was handed a Very best Fairways Award to be the most golf-friendly courses for ladies. Additionally, it is recognized as the most fun Maui courses for players. Comprising 6, 825 meters, you will discover carpet-like fairways, an abundance of vistas exposing the Ocean and also the volcano, and a good amount of colorful flowers. For avid gamers that like to possess a challenge they are able to tailor any course in their needs through four in addition to six first tee boxes. [url=http://www.superthenorthface.com/index.php?main_page=index&cPath=1_13_27_31]windstopper jackets[/url] Your Village Course The Community Course can be filled because of the right aspects to present a awe-inspiring view along with a challenging sport. Your game are going to be graced by means of hilly surfaces, plenty associated with bunkers, along with 4 drinking water hazards. Moreover, you may have breathtakingly panoramic views for the Pacific Seashore, Lanai, along with Molokai. Makena Northern Course Makena North can be found on 1, 400 acres associated with land. Effortlessly beautiful as well as unspoiled, this course is designed for golfing in most way. This 18-hole program was designed by Robert Trent Jones Jr. [url=http://www.superthenorthface.com/index.php?main_page=index&cPath=1_4&zenid=190bd614b28c4db86ee80f278ff868e9]gore tex pro jacket[/url]The views in the Pacific are usually as crystal clear as afternoon. Many men and women play slowly as they definitely end right up watching that whales or interested to the nearby islands inside the distance. The 10th hole gives natural Local rock the wall surfaces and you'll find natural gullies and even streambeds all over the entire study course. Truck tents are becoming more and more popular everywhere from Gulf Coast for the East Sea-coast and many of the cities concerning. Most stores are selling out in truck tents. Truck tents are a terrific way to incorporate the other space on the back with the truck as your own private camping space. [url=http://www.superthenorthface.com/index.php?main_page=index&cPath=1_13_19]soft shell the north face[/url]For the buying price of a daily hotel you can aquire your have tents they'll last for quite a while. These tents are an easy task to put away anything put into use almost anywhere in under 20 or so minutes. Sleeping outside is obviously a fun strategy to spend friends and family time you will want to use a bed to your truck for the reason that your tent you'll be surprised by how effortless a pickup truck tent is definitely. You might also purchase an airbed to easy use in your cargo van tent, then you will be off the earth and sleeping using a comfortable mattresses. These different types of tents are new nevertheless they are rising in popularity day after day. [url=http://www.superthenorthface.com/index.php?main_page=index&cPath=13&zenid=190bd614b28c4db86ee80f278ff868e9]north face for women[/url] You will find two major forms of truck tents; one which has a unique floor and the other without carpeting / flooring. If you decide on a tent with a sewn during floor you'll have to take out many the bed of your truck simply uses put all the tent all the way up. If you get a camping tent without carpeting / flooring, then you may leave ones gear from the truck when you set in the tent. Some corporations that put up for sale truck tents will suggest that you experience the truck a specific direction anytime camping. Usually that manufacturers will suggest that the front of your truck might be facing into your wind. Should you choose decide to face your truck inside the wind it's possible you'll notice that it can help keep the actual rain from a truck or maybe tent. [url=http://www.superthenorthface.com/index.php?main_page=index&cPath=1_13_27_30]north face for boys[/url]Many on the higher and truck tents usually are tight an adequate amount of that it does not matter which manner you face your automobile. Another important difference around truck tents is the kind of polls which can be used. Some brand names give tent poles which can be color coded so one of these are much easier to put up. For the tents that do not consist of color coded outdoor tents poles some people do adapt to this plus learn quickly the right way to install his or her's truck outdoor tents correctly. Another negative to all of the tent posts is who some camping tents poles actually require you to crawl into the tent so that they can put typically the tent " up ". Should you enjoy camping and you also own a truck make sure you definitely here is another truck outdoor tents. They are wonderful means to take pleasure in the outdoors during sleep off of the ground. Because you have been sleeping off of the ground you're not as likely to pick up wet on the ground. Also all the sides on the truck give you more protection belonging to the wind plus cold and you'll find that you will be warmer from a truck covering than easier going with an occasional tent. Truck tents absolutely are a great new method for families as well as couples have fun in the great outdoors together they don't cost a whole lot money and you may find tents to install almost every style of vehicle. Next time you are thinking about buying the latest tent consider investing in a truck outdoor tents. . [url=http://tullabbk.com/pg/blog/owner/golama] Other About face blog [/url] [url=http://www.breatheonline.ie/blog/] face [/url] [url=http://www.pakistanmusicidol.com/members/yngranquismeril] About superthenorthface.com blog [/url]
-
Most of us agree that canopy control is the most important, and most difficult aspect of skydiving instruction. Within this broad objective is the ability to fly a safe and consistent landing pattern. This is crucial for everyone, from the highest level of experience down to the beginner. The clear necessity for improvement in this area has been demonstrated time and again with the unacceptable frequency of canopy collisions and low turn accidents that have plagued our sport for far too long. General aviation has implemented many new technologies to assist pilots in navigation. These tools have enhanced aviation safety, and such devices are not considered crutches, but a necessary part of safe flying. Similar advances are now commercially available for skydivers as well, but many do not include these instruments in their safety toolkit; least of all for primary instruction methodologies. It is time for this to change. Altitude awareness is not something that ends once the canopy opens. Knowing precisely how high we are throughout the approach and landing is vital for consistency, and many of the traditional analogue devices are unable to provide truly trustworthy data. The digital altimeters that are now widely available are accurate within ten feet or so, but they have one tragic flaw: the pilot must look away from the ground, and away from the traffic, in order to access the information. Having water available does not guarantee that the thirsty will drink, and as altitude diminishes and stress level increases, visual altimeters are used less and less. As many high performance pilots have come to realize, audible altimeters are an incredibly powerful aid for heads-up access to the information that saves their lives. The time has come to utilize these tools for students and intermediate skydivers as well. A pattern is a simply a series of invisible points in space, what some have come to refer to as "altitude-location check-points". With three or four ALC's, a canopy pilot can follow a preplanned path through space to a predictable landing point. When these ALC's are programmed into an audible device such as the Optima, with its impressive tolerance of + or - only ten feet, the distracting glances at a visual altimeter become mostly unnecessary. More importantly, I have found that my canopy piloting students who use such audible cues are more aware of their surroundings, and are far less likely to run into other canopies on the way to the target. Even more importantly, by having their eyes focused "outside the cockpit" so to speak, the canopy pilot learns exactly what the ground looks like at the various altitudes. Therefore, I have discovered, if there is an instrument failure in the future, they have "calibrated their eyeballs", and are aware when they are too low to execute a hard, descending turn. Many instructors have grown accustomed to preaching the party line that relying on instruments for canopy flight is inadvisable. Although there is some merit to training our eyes to recognize key altitudes, simply trusting our inborn instincts is not an effective way to accomplish this goal. When a “flat-line” beep goes off in your helmet that marks 300 feet AGL, and you happen to be looking at the ground at the time, you immediately become a better canopy pilot. Furthermore, when you are focused on your surroundings, rather than a dial on your wrist, you are more likely to make the necessary course corrections that lead to the target. The primary reason for missing the target is, and always will be, failure to maneuver when a course correction is necessary. When you always know how high you are, and are observing your location in relation the target, you are far more likely to make the change that puts you in the peas. The safety concerns regarding the use of audible devices for flying a pattern can be addressed with a few simple rules. The first rule is, if you don’t get the first beep, assume that the instrument has run out of battery life, or is improperly programmed. When the initial pattern beep comes, verify that this is in fact the altitude that you expected it to be by looking at your visual altimeter. If it is not, or you hear nothing at all, use your visual altimeter for the remainder of the jump, and sort it out on the ground. Above all else, your eyes are your default, and you can veto what the audible is telling you, or not telling you. If it doesn’t look right, put your parachute over your head and prepare to flare for landing. There have been many technological leaps that have changed the sport forever, and audible information for canopy flight is proving to be one of the most profound. By knowing exactly how high we are at all times, we can act appropriately. We can relax more as we fly our approach, and enjoy the simplicity and joy of landing our parachutes without worry. Above all else, the reduction of the stress within each canopy pilot, both student and expert, has proven itself to allow for the full expression of skill that training has made possible. When we embrace such advances, we can more easily expand into the pilots we were meant to become. BSG Brian Germain is a parachute designer and test pilot, and runs canopy flight skills and safety courses all over the world. Brian has made over 14,000 jumps in his 25 years in the sport. He is also the host of the “Safety First” segment on SkydiveRadio.com, and the creator of many educational You Tube videos. Brian is the author of the widely popular canopy flight text The Parachute and its Pilot, as well as Transcending Fear, Greenlight Your Life, and Vertical Journey. His upcoming book entitled “Vibe Matters, emotion is everything” will be coming out later this year, along with the long awaited educational packing video “No Sweat”. His websites are www.BIGAIRSportZ.com and www.Transcendingfear.com and his YouTube channel is: www.youtube.com/bsgermain
-
 Phoenix-fly announces a new Coaching program to replace the Phoenix-fly Instructor Program. Rising up from out of the ashes is the Phoenix and the latest re-start at Phoenix-fly is the dismantling of their “Instructor” program and the birth of a new Coaching program, making room for a gradual move towards a more official training standard. “With the recent rise in wingsuit-related incidents and the tremendous growth in the wingsuit discipline, we felt it was time to re-examine our roster of manufacturer-endorsed instructors and determine a path for instruction that not only provides the best methodologies for training, but also provides an accessible, consistent system that Phoenix-fly can firmly stand behind,” says Jarno Cordia, Global Marketing Manager for Phoenix-Fly. Phoenix-Fly’s history is well known; president and founder Robi Pecnik was one of the first and easily the most innovative wingsuit designer in the early days of wingsuiting. Paired up with Jari Kuosima, they formed Birdman. Pecnik kept the company on the leading edge of suit design while Kuosima sold suits. Together they built a powerhouse product line, and over time they instituted a training program to help skydivers get their wings into the air. The program was primarily authored by Chuck Blue and Henny Wiggers.This was known as the “Birdman Instructor” program. In 2004, Pecnik grew dissatisfied with the direction Birdman was taking, and so left to form Phoenix-fly. Many Birdman Instructors (BMI) automatically received Phoenix-fly instructor ratings when the competitive company was formed, and the Phoenix-fly program moved forward and grew from that base of early instructors. It was later discovered that some of the BMI’s had received their ratings via email. In short, some of the new PFI’s had never received formal training of any kind. “We’ve found over the course of years that instructors were going uncurrent or teaching First Flight Courses to skydivers that didn’t meet the industry-recognized recommendation of 200 skydives in the last 18 months,” said Jarno, “We needed to address this, and with the spate of recent fatalities, we wanted to address it before someone was killed or injured during one of our training jumps. A high percentage of the recent fatalities fall well below the 200 jump minimum required by Phoenix-Fly and now by the new USPA BSR.” With this in mind, the old PFI or “Phoenix-fly Instructor” program has been dismantled and the replacement program being steadily brought online. “We made four Phoenix-Fly Coaches (PFC’S) this past June, with others lined up to obtain their rating in the fall months,” says Douglas Spotted Eagle (DSE) Director of US training. “With the new additions to the SIM that myself and a team of wingsuiters authored, the recent changes in the program Robi and Jarno wanted to make, and the USPA adding a Basic Safety Requirement related to wingsuiting demonstrated that now is the right time to change up the program.” Holders of the Phoenix-fly Instructor’s patch now hold a souvenir of the time they taught beginning wingsuiters. The Phoenix-Fly Instructional rating does not automatically translate to the newly founded Coach rating, and requires some re-training to merge into the new methodology of the PFC program, as well as a USPA Coach rating (USA-only). “The new program parallels the USPA Coaching program and in fact we now require, rather than recommend, that Phoenix-fly Coaches in the USA hold a current USPA Coach instructional rating,” says DSE (who also holds a USPA Coach Examiner rating). According to Cordia, “We’re looking at requiring something similar for our non-USA Coaches. We’re already in the process of training up a Coach/Examiner for South America and he’s a USPA AFFI, TI, and just finishing his Senior Rigging rating. These are the kinds of people we want teaching and evaluating potential coaches.” The newly developed program fundamentals came from the coaching techniques initially developed by Skydive University, discussions with other wingsuit coaches, and weaknesses observed over hundreds of student jumps. Kinesthetics, isometrics, visual imagery, and student repetition are all part of the revamped PF First Flight program. First Flight Courses take slightly more time and provide improved and up-to-date information regarding navigation, deployments, and emergency procedures. Scotty Burns of Z-flock points out, “We’ve been teaching wingsuiting based on methods developed in the early days of wingsuits but the suits of today are much bigger, faster, and potentially more dangerous than they were ten years ago. This new program arms students with the knowledge they’ll need as they undergo the wingsuit journey. I’m really excited about it. I’ve taught dozens of wingsuit students over the years and know what to expect in an average First Flight. Since I’ve started training with this new program, my students somehow have been flying better. This thing works!” “Having watched numerous wingsuit first flight courses, I can say with confidence that the PF coach program takes instruction to a completely new level, using various well thought-out techniques that deliver the best training I could think of,” commented recent PFC graduate Andreea Olea. “It's amazing how well it works with all kinds of students, from the most distracted to the most clumsy to the most cocky ones. Quality wingsuit training at its best - major kudos to Phoenix-Fly for setting such an excellent standard!” Phoenix-fly coach candidates that have obtained their USPA Coach rating should plan on attending a Phoenix-Fly Coach training session at Skydive Elsinore, Skydive Utah, Skydive City/Zephyr Hills, or at Raeford Parachuting School with Douglas Spotted Eagle, Scotty Burns, or Chuck Blue. There is one half day of classwork, some of which will recall training received during the USPA Coach rating process. The second half day is a jump day, in which students must receive two satisfactory scores in three possible jumps. The jumps are scored using criteria very similar to the USPA Coach evaluation form. Candidates are also required to pass a written test before receiving their Phoenix-Fly Coach patches. “Phoenix-fly Coaches must teach a minimum of six First Flight Courses per year and 15 coach jumps in order to remain current,” says DSE. Phoenix-fly Coaches receive special discounts on PF wingsuits, access to the PF training fleet for special events, and other unique discounts and opportunities via PFpartners. “Truly, we’ve changed up our program so it meets a standard consistent with the USPA methodology of training and coaching, and so that the new program is consistent with the new wingsuiting additions to the USPA SIM. We’re looking to insert additional Coach/Examiners so that there are more geographical points in the USA where potential Phoenix-fly Coach candidates can more readily receive training and pass the course,” says Cordia. “We believe we’ve built a new training program worthy of even the most challenging students.” “From the USPA perspective, we’re thrilled to see Phoenix-fly step up their training to prepare skydivers for bigger suits, low-tail aircraft, and overall safety. The fact that the program is consistent with existing USPA standards and training programs is a bonus for all, ‘ says Jay Stokes, President of the USPA. Former Phoenix-Fly instructors wanting to update their Phoenix-Fly rating, or anyone qualified to challenge the PFC course may contact one of the PF Coach Examiners to arrange for a training class. Phoenix-fly Coach Courses are currently available at: ~Skydive Elsinore (Douglas Spotted Eagle) ~Skydive Utah (Douglas Spotted Eagle) ~Raeford Parachuting Center (Chuck Blue) ~Skydive City/Z-Hills (Scotty Burns) -The Parachute Center, Lodi, CA (Ed Pawlowski) Contact Jarno Cordia for other countries/regions Dropzones are encouraged to check Phoenix-fly.com for information regarding the active status of Phoenix-Fly Coaches.
 -
Landing your canopy in a specific place is a skill that we all must master. If you cannot land where you want to, eventually you will land someplace you don’t want to. Honing this skill is something that we all must pursue, and how we approach this will determine whether or not we survive the learning process. We must first learn how to land on a runway before striving to land on a specific point. When pilots try to skip this step, they often run into significant stumbling blocks, some of them requiring surgery. Once you are proficient at hitting the centerline of a runway with consistency, then you can move on to more specific targets such as entry gates and landing points. One of the most important aspects of any approach is the “entry angle”. Although we can often repair a flawed approach, there are limits to our course corrections. The parachute can only do so much. If you set up too close to the target or entry gate of the swoop course, you may be in for a painful lesson. Too tight is a very dangerous place to be. Even if you are flying a conservative approach, making gentle turns to final, this can still bite you. When a pilot strives to land on a target that is mostly underneath them, they are on what I call “the path of crazy shit”. You can almost hear the banjo music starting like in a chase scene in an old western. There is no graceful way to land on a target that is directly below you. The parachute wants to glide, and turning or diving to get there will always put your life at risk. If you are a swooper, the consequences of being too close to your entry gate are dire. You may have the potential to extend the dive of your canopy to make the entry gate, but all you will do is make a divot between the flags that mark the location of your final act of egoistic stupidity. Let it go, and live to swoop another day. If we are too far away from our entry gate, real or imaginary, our solutions are simple, and generally quite safe. “Shallowing” of the approach can easily be accomplished by letting off the dive early and/or holding a bit of brakes or rear risers. We do not often read incident reports about canopy pilots who died a horrible death as a result of holding two inches of rears to stretch their glide back to the target. Set up deep, and tighten up over several jumps. The hard part comes when you have set yourself up, started your dive, and are not sure if you can make the gate or not. You are tight and steep, and you think that if you make it you are going to be a hero. Hero or zero that is; only time will tell. If you hold your swoop in your hand like a butterfly, hoping it will not fly off, you will live far longer than if you squeeze it tightly and try to force a square peg into a round hole. Either it is there or it is not. You need to train yourself to know when you are too tight by knowing what it looks like when it is just right. Visualize the perfect entry, not too shallow, not too tight, with the target or entry gate out in front of you. Walk through the sequence, setting up tiny gates on the ground, and practice making aborts by lifting your eyes from the entry gate and landing long. If you are looking down at it, just let her fly, land safely, and go up and do it again. There is always the next jump. They key to a good abort procedure is training. Without physical rehearsal for physical activities, our cognitive understanding is useless. We have to practice arresting the dive over and over, and find new ways of putting our parachutes into level flight quickly. The first concept is: “Pitch Before Roll”. This means that the turn itself is less important than the pitch attitude of the canopy. When you are striving to pull up from a diving turn, increase the canopy’s pitch angle before striving to recover the roll. Bank angle does not kill people, descent rate does that. If you nose your parachute up, you will increase the angle of attack of the wing, which will give you the added lift that will reduce the decent rate. This will afford you the time to reduce your roll angle prior to touchdown. You literally create time. The second concept that supports healthy recovery technique is: “Sharp Inputs Create Sharp Results”. Slowly applying the brakes, regardless of the depth of the input, will never create the high rate of pitch change that shorter, sharp inputs can. This is the same reason why slow flares, when started at a very high altitude, will not cause an adequate change of direction of flight so as to create a level-off for a soft landing. Practice giving sharp stabs on the brakes while in a turn, and see what it does for you. If your weight increases dramatically, you know you are creating a change of direction, since inertia is resisting your change of motion. Another relevant concept with regards to saving yourself from a low turn is: “Give Up Some Heading”. If you strive to arrest your dive and stop the yaw too quickly, you are likely to wobble on the roll axis. This is because the increased lift on the low wing is bringing that wing up, beginning an oscillation about the roll axis. This can easily be prevented by allowing the turn to continue a bit following the increase in the angle of attack. Look into the turn, and let the wing follow through with its natural over-steer tendency, perhaps as much as 90 degrees when recovering from a fast turn. This overshoot can be as little as 20 degrees in a slower, carving turn. When you strike the toggles, do it with a short, strong burst-and-hold of 12-18 inches, but do it in an asymmetric manner that continues the current momentum of the turn. This will allow you to smoothly and slowly exit the turn and enter your final landing procedures gracefully. The last idea that seems to make a difference in how quickly you are able to pull up from a low turn is where you are looking: “Look Where You Want To Go”. If you are like most people, you will stare at your impending impact point on the ground, right until landing. By focusing your attention on what you don’t want, you inevitably make it happen. Somehow we are drawn toward whatever is in the center of our focus, so it is a far better plan to look toward where you intend to go, rather than where you are currently going. If you have turned too low, your current destination point is somewhere below you, while your intended flight path is in the general direction of the horizon. Lift your eyes, and make your parachute fly toward where you want to go. Focus is more than the object of attention, it is the shape of things to come. Aborting is a part of life. Humans are not perfect, and sometimes we are incapable of fixing our errors. Targets and entry gates are fun to shoot for, but not at the expense of our bodies. Aim to fly a clean approach every time, and let your gut tell you what to do. If it feels bad, it usually is. Do not let your desire to make the swoop course or the peas keep you from seeing what is right in front of you. Ego distorts our vision, as does passionate desire. The only way to see clearly is to remain calm, breathing slowly and completely throughout the approach, and maintain a positive mood as you set yourself up. If you start to feel scared, it is your cue to breathe more and try less. The perfect approach always feels easy. It flows like water. It is the result of good planning combined with good execution, made possible by positive emotion. Joy is thrust, fear is drag, ego is weight, and knowledge is lift. Maximize lift and thrust, and you will go far. Go Big Live Long BSG Brian Germain is the author or several popular skydiving books including: The Parachute and its Pilot, Transcending Fear, Vertical Journey and Greenlight Your Life. He also has a spot on Skydive Radio called “Safety First with Brian Germain. Brian runs canopy flight courses throughout the world, and does motivational keynote speaking on the topic of transcending fear. His website is: www.BrianGermain.com
-
Although there are many ways to improve one’s accuracy in parachuting, I have found no better way than flying a consistent pattern. By connecting a series of invisible points in the sky, “Altitude-Location-Checkpoints” as I call them, we can create a consistent flight path that makes us more predictable in the air, as well as significantly increasing our chances of landing on target. The typical pattern, made up of three distinct turn points, I will now argue is not quite enough to get to the target with the consistency we are looking for. The standard flight pattern for a ram air parachute involves a downwind leg, a cross wind leg, and an into-the wind leg, also know as the final approach. This pattern is defined by three distinct turn points, “A” (Base to Final), “B” (Downwind to Base), and “C” (pattern entry point). It is true that if we are prepared to modify our approach in light of new information along the way, we can hit the target. But wouldn’t it be nice to get there without needing to modify our flight path, to just sail along and turn when the altitude is right? That is exactly what the inclusion of a fourth turn point does. The trouble with the standard pattern is that there is a good deal of guesswork when it comes to the length of the Base leg. Depending on the glide ratio of the parachute, the location of the turn to Base leg will vary widely. The better the relative glide ratio, the farther the turn to Base needs to be from the target. Our ability to adapt to this changing environment is spotty at best, and often requires substantial correction along the way. This creates traffic conflicts, as well as varying airspeed and decent rate, making life far more difficult for us, and for the canopies behind us. In most cases, the length of the Base Leg needs to be longer than we think. This becomes an even more important issue for swoopers setting themselves up for a high speed approach. If the length of the Base Leg is incorrect, the pilot is forced to either float in the brakes or “S-Turn” prior to the initiation of the dive. This has consequences to the approach, even if they manage to reach the Initiation Point at the correct altitude. If they are flying significantly faster than usual when they arrive at the initiation point, they may lose much less altitude in the turn due to the increased front riser pressure upon initiation. If they are flying significantly slower than usual, they may lose a much greater amount of altitude in the turn, and find themselves hooking into the ground. It is my experience that, aside from the altitude of the Initiation, the selection of the “B” point is the most important aspect of a high speed approach. If we simply add another checkpoint prior to the entry into the Downwind Leg, we can take the guessing out of the process. Assuming that the turn points are equidistant in altitude (300, 600 and 900 feet), we can simply add another unit above the original pattern entry to create a fourth, or “D” point, precisely on the wind-line, upwind of the target. What this does is, it creates a Pre-Base Leg, which shows us exactly how long the Base Leg needs to be. In other words, if the altitude between the points is 300 feet, the “D” point is at 1200 feet. The beauty of the data that this “D” point brings us is, we discover the exact length of the base leg without choosing the precise location of the “B” point prior to exit. This means that we can fly this pattern at a new drop zone, or when we are landing off, and learn where the altitude-location-checkpoints are for that specific landing area. It doesn’t help us with the “depth” of the pattern points, but it puts us in the ballpark, assuming that we have a rough idea of our canopy’s glide ratio. When the winds pick up, this method still works perfectly well. The crab angle on the Pre-Base Leg is equivalent to the angle of crab on the Base Leg. Note that the horizontal distance of the offset from the target on the downwind leg on a windy day is exactly the same as it would be on a no wind day (A to B = Anw to Bnw). This is only true if we do not compensate for the side-slip of our ground track due to the crosswind legs. However, even when we do choose to compensate for diagonal crabbing on the base leg and create a “Holding Crab”, if we create the same crab angle on the Pre-Base Leg, we end up on the perfect final approach despite the complex situation. This is easily accomplished by simply making our goal to fly a box pattern on the ground, flying our Pre-Base and Base Legs perpendicular to the wind-line. Also note that the length of the base leg is longer on the No Wind condition than it is on a windy day on which we perform a Holding Crab on the crosswind legs. This is due to the reduced groundspeed when in a Holding Crab, and the diminished glide ratio that comes as a result of it. If you aren’t pointed where you are going, you will not move there quite as quickly. This method assumes something that many canopy pilots do not have: a trustworthy altimeter. A standard dial-type, analog altimeter is not sufficient to give us the kind of accuracy we are looking for. Even the digital dial-type is not usually graded in such a way that we can distinguish units of one hundred feet or less. These are freefall altimeters. For the precise data required by today’s canopy pilots, we need digital altimeters with digital read-outs. Even better, many of us have found, is the heads-up advantage of an audible altimeter designed for canopy flight such as the Optima and Neptune. If you have an audible alert telling you where you are, it is far easier to keep your eyes looking outside the cockpit and on the action that may require your instantaneous reactions. All that being said, your eyes have ultimate veto power. If things do not look right, your instruments must be ignored. Too many skydivers have hit the ground due to complete faith in their instruments that let them down due to mechanical problems, battery issues or some unconsidered technical malfunction. Assuming that you use this accuracy technique the way it was intended, and you notice what is happening as it is happening, you can take a huge step forward in consistently hitting your target runway. It will take a while to dial-in your approach so that you actually hit the target, but the target is always a secondary goal to hitting the centerline of the runway and turning to final at a reasonable altitude. If you plan your pattern well, using four distinct points along the way, you can change what you are capable of handling as a canopy pilot. Not only will you feel better about yourself, you will increase the likelihood that you will live a long, healthy life. That, of course, is the mark of a great skydiver. In addition to being a highly experienced skydiver with over 14,000 jumps, Brian Germain is the author of several books including The Parachute and Its Pilot, Transcending Fear, Vertical Journey, and Green Light. He is currently designing canopies for Aerodyne Research, and offers canopy flight courses worldwide. For more about Brian’s Books, Seminars and Parachutes, visit his websites: www.BigAirSportz.com and www.TranscendingFear.com
-
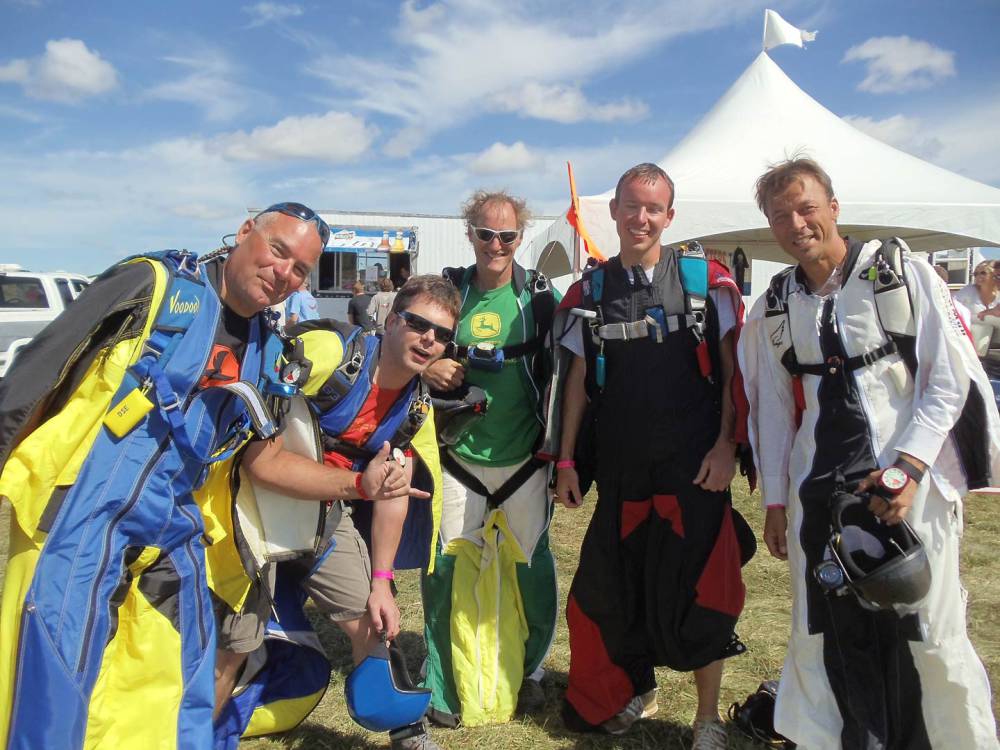
There I was, in the middle of a Utah winter, dreaming about jumping again. I’d recently finished editing a couple of instructional DVDs regarding wingsuiting, and those videos had sparked a new interest for me: I wanted to learn wingsuit flying in the upcoming jump season. My budget was tight, and the cost of a new wingsuit seemed high. “Why not build my own suit?” I wondered. My sewing skills were adequate for patching canopies, but that was the extent of my expertise. I’d been planning to work on sewing projects this winter… projects that would expand my knowledge of sewing. This was a logical step, I ventured. Surely building a wingsuit would help me in the seamster department, provide a suit for me to use in springtime, and keep my budget intact… it all appeared to be a fantastic idea. I went through a list of resources I had available: 1) A great DZO (Jack Guthrie) who would allow me use his sewing machines. 2) A good friend (Douglas Spotted Eagle) who would let me borrow a wingsuit for a while. Note: Neither Douglas nor I expected that “while” to be 4.5 months. 3) My girlfriend’s mother (Jane) works at a fabric store, and has extensive knowledge of available fabrics and parts such as zippers, snaps, etc. 4) A Wingsuit manufacturer (Tony Uragallo, of Tonysuits) Tony Uragallo of Tonysuits who was willing to answer some questions I had about wingsuit design and assembly. Tony’s input was key during a few points in this project. The first thing I did was take the borrowed wingsuit to Jane at Hi-Fashion Fabrics, in Grand Junction, CO. She inspected this Tonysuits Mach1 and helped me create a list of fabrics and parts necessary to build a replica. That day Jane was able to provide me with all the Parapac, Supplex, and Cordura I’d need, for about $225. Some parts, such as zippers, binding tape, snaps, and thread were purchased from other stores. Next step was creation of a pattern. I laid the borrowed Mach1 out flat on the floor and inspected the design. It became apparent that this design could be easily broken down into three main pieces: Right wing, Left wing, and body piece. Jane had donated some white basting material, which she thought would work well for the large pattern pieces I’d need. I started copying the body piece first: tracing the front skin and rear skin onto my pattern material. Much like the top and bottom skins of a ram-air parachute, these front and back skins would have ribs connecting them: providing an airfoil shape when inflated. The two skins were easy to trace and cut, but adding the ribs required some planning. Because these ribs were inside the model suit and therefore out of sight, I decided it was time to reach out to Tony Uragallo, designer of this suit. I explained to Tony that I desired to learn more about sewing, and this was a project for my learning. Tony said if this was the only suit I’d build, and if I’d promise not to begin manufacturing more of his design, he’d help me out. Tony provided key information about size and shapes I should use for ribs in all three wings: Tail wing, right wing, and left wing. I wish I could say that the project was a breeze from this point on, but there were two key points of sewing that I needed to learn. First: Thread tension in the sewing machine. I’d purchased 210 denier Parapac, and when I began sewing two layers of this light fabric together, the stitches would bunch together, causing each of my seams to shorten, thereby slightly changing the size of my pieces. You can see bunching in these seams, more severe in some areas than others. The thread tension needed to be very loose. I was nearing completion of the main body piece before I finally understood how to correct both top and bottom thread tensions in the sewing machine precisely. Second: Patterns must be laid out horizontally or vertically on Parapac material in order to make them hold their shapes symmetrically. I’d been thinking of how to maximize number of pieces that I could get from my pieces of Parapac, and so I’d placed the parts at odd angles on the fabric. Oops. This pattern should have been rotated such that it pointed straight up the What did this mean for my project? As I neared completion of the main body piece, and began attaching zippers from foot to throat, I saw the body was leaning hard to one side. It took me a while to figure out the issue. I knew all my pieces were cut symmetrically because I’d folded the front and back skins in half when cutting them… why were they no longer symmetrical? The body piece warped into an asymmetrical shape Finally it dawned on me that if I pulled one side of the body, it would stretch several inches. Pulling on the other side however wouldn’t yield much at all. This was because the threads of this fabric were not running straight across my pattern. The only way I could deal with this big error: wad up the body piece and start from scratch. At this point I was approx 25 hours into the wingsuit project. With these lessons in mind, my second body piece was built much faster. My patterns were already made, so the parts were quick to cut and mark. Since I was still relatively new to sewing, assembly did take me another 12 hours til completion of the main body piece. Thankfully this body piece was symmetrical after completion, and proper thread tension had been used throughout. Now for the arm wings. Tracing parts for the arm wings wasn’t nearly as simple as it had been for the body piece. There are quite a few curves and angles, which were difficult to duplicate when using a pre-assembled wing as the model. Another difficulty in the arm wings: Each rib shape and size was completely different from the others. You can see that each wing rib is unique. Creating these pieces takes time My leg wing had used identical ribs, because each rib was approximately the same length and height, creating a uniform symmetrical shape. Arm wing shapes for the Mach1 are much more complex than the leg wing, and use of CAD software would be necessary to create truly accurate patterns for this. After much painstaking measurement and pinning of my patterns, I was satisfied that I’d created a suitable set of patterns for my arm wings, close enough I believed to provide a fully functional wingsuit. The wing ribs are first sewn to the bottom skin, then top skin is attached at gripper Assembling of both arm wings took about 25 hours. There are air locks, zippers, inner sleeves, elastic, snaps, and binding tape involved. Next step is sewing top edges of wing ribs to the top skin, essentially “zipping up” from outside in With the right wing, left wing, and body piece assembled, I figured I was very close to completion. Then I learned how difficult it can be to create correctly sized booties, and to attach them in appropriate places on the legs of a suit. My first attempt at booties took 10 hours and failed to fit me. Those booties found their way to the trash can, and the second set took another 5 hours… these fit much better. Booties need to be made wider than the shoe, so that the shoe can slide in easily. After the booties were finally finished, I had only minor trim parts to finish, and final connection of all three pieces. Tony’s Mach1 design made it quick and painless for me to mount the wings: Tops of the wings zipped on (up and over the shoulder), and bottom of the wings required a simple straight seam, one running down the side of each leg. I tried the suit out while wearing a rig, and it fit quite nicely. However, I still needed a bit of training before I’d feel comfortable jumping out of an airplane with these wings attached. The suit fit, but I needed some more instruction before taking it to the skies.Photo by Dru Poma I’d already been through a First Flight Course with Scott Gray, and a refresher course with Scotty Burns, but both those classes had been several months ago. First I sat down in my living room & watched the FlockU DVD that I’d edited, Wingsuits 101, to refresh my memory. Next I called on my WS instructor friend, Douglas Spotted Eagle, and requested that he run me through all the ‘what-ifs’ (ie: what if I go upside down, what if I start spinning, what if I can’t find my handles). Douglas put me through all these scenarios, and finally I felt comfortable that I could handle any of these situations. The following day was gorgeous, with blue skies and warm weather over Skydive Utah. Douglas came along with me for my initial jump in this suit, and took a few photos. Boarding the plane requires some concentration when your feet are inhibited by a leg wing. Photo by Dru Poma Riding up in the plane reminded me of a night jump: all the training had been covered in detail on the ground, yet still I was nervous. A few minutes after takeoff, we were at altitude, with an open door awaiting our exit. I hopped out of the plane and counted “Jump one thousand, Wing one thousand”, then opened my wings. I could feel the positive pressure inside the wings.Holding my arms in place required little effort. Photo by dse All three wings inflated evenly, and the suit felt stable. Photo by dse Photo by dse I didn't keep my tail wing collapsed during deployment, resulting in line twistsPhoto by dse Douglas and I flew a left-hand box pattern, and I deployed at 5,000 ft. My giant grin was evidence to those who met me on the ground that my Mach1 replica had flown well and had provided great enjoyment. I’m looking forward to jumping this wingsuit many more times this summer so that I may learn more about the exciting discipline of wingsuiting. There are quite a few tricks I need to learn through practice, such as keeping my leg wing closed throughout deployment of my canopy. photo by Dru Poma When all was said and done, I’d spent over 100 hours planning, researching, buying parts, and building this wingsuit. Also, I’d spent about $350 on parts and equipment for this suit. A little math made me realize that if I’d worked a minimum wage job and spent 100 hours working it, I’d have been able to buy a new suit from the manufacturer with all options, would’ve received it much quicker, and would’ve spent the same. Would I recommend this project to anyone else? No way. Go buy a suit from a manufacturer and realize what a deal you’re getting! They may seem expensive at first, but once I understood the amount of R&D; that goes into each design, and the amount of customization required for each individual suit, to fit each owner’s body, I realized that the MSRPs for these suits are actually very reasonable compared to parts and labor combined, for building my own suit. Cost and time aside, I’m glad I built this wingsuit. My ability to sew improved exponentially as I worked with this project, and my understanding of how wingsuits function increased drastically. Chris Warnock is a TI, AFFI, Rigger, Canopy Coach, and videographer at Skydive Utah. Chris produced the "Canopy Control" DVD with Chris Gay for VASST. See him fly at the FreeFlock Utah Boogie in July, 2009.
-
I have spent much of my life studying parachute stability. It has become an obsession of sorts, spurred by a fairly sizable stint in a wheel chair- funny how that works. I have designed and built many, many canopies with the goal of creating collapse-proof canopy. I have failed. It is impossible. This is the case because, despite the best efforts of the designer to increase internal pressurization and dynamic stability, the canopy can still be flown badly and become unstable. This will always be so. The job then, falls on the educators, and on the pilots themselves to learn and rehearse the essential survival skills that increase the chances that the correct action will be taken in the spur of the moment. I stated in my original article on turbulence, entitled “Collapses and Turbulence”, that the key is to maintain lots and lots of airspeed and line tension. I still hold that this is generally the truth. However, upon re-examining the situation, I have realized that my perspective on the situation is based on my frame of reference. I fly sub-100 square foot cross-braced speed machine that falls out of the sky like a homesick bowling ball. I do not really represent the whole. The average-size parachute is 150-170 square feet in the civilian world, and much larger for students and military jumpers. In further exploring the issue from the perspective of lighter wing loading and larger parachutes, I have discovered that this is not necessarily best way to fly a larger canopy in chaotic air. Here is why this is so: If the parachute has a great deal of drag, i.e. a light wing-loading, thick airfoil or is a large parachute in general, the rules change. Such canopies are less capable of maintaining high speeds unless flown very aggressively. Due to the high drag variable at the canopy end of the drag equation (“Rag Drag”, as I call it) the excess airspeed makes the canopy itself want to retreat behind the jumper far enough to reduce the airspeed far below the unadulterated full flight speed. This momentarily increases the likelihood of a collapse. The parachute levels off in mid air, slows down, and for a brief moment, becomes vulnerable to collapse. Therefore, when flying a canopy with a short, powerful recover arc, aiming to increase the speed beyond full flight becomes a double-edged sword. If the timing is wrong, such as when leveling out high (prematurely), the situation can become very dangerous. The truth is, leveling off well above the ground is dangerous for any wing-loading, and can happen with any parachute due to an incomplete plan or an imperfect execution. Parachutes flown below one G, at speeds less than full flight speed tend to be more susceptible to collapse. So, if the pilot is quick with their "Surge-Prevention Input", (what paraglider pilots call "flying actively", the risk of collapse is significantly reduced as the negative pitch oscillations will be minimized, thereby diminishing the likelihood that the wing will reach a low enough angle of attack to actually achieve negative lift and dive toward the jumper (i.e. collapse and scare the daylights out of you). Given the fact that the only preventative or corrective response to a collapse is to stab the brakes as quickly as possible, the sooner the pilot responds to the forward surge, the less the input necessary to avoid or correct a collapse. Therefore, a canopy with a great deal of slack in the brake lines will require more motion on the part of the pilot to create any appreciable effect. This means that a canopy that is in full glide, with the toggles all the way up in the keepers and three inches of excess brake line trailing behind will take longer to see an increase in the angle of attack due to the control input than one with no slack in the brakes at all. So then the question is posed: “Do we shorten the brake lines on larger canopies to help the pilot prevent collapses?” The answer to this is no, we cannot. This will result in serious bucking during front riser input. It will also mean that following a few hundred jumps, the canopy will be in significant brakes when they think they are in full flight, due to their “lazy arms” pulling the tail down when they should be flying arms up. This will result in lower average airspeeds that will reduce the parachute’s flare power, as well as it’s penetration into the wind. This will also result in more oscillation and distortion in turbulence. The answer comes to us from our sisters and brothers in the paragliding world. They teach their students to hold a touch of tension on the brakes when flying through turbulence. The goal here is not to put on the brakes and deform the tail, but to simply take up the slack on the brake lines, in preparation for a 12-24 inch strike on the toggles to prevent a collapse. Some teach their students to hold about 5 lbs of pressure on the brakes, while others teach that we should hold no more than two inches below the “Feel Point”. Either way, taking the slack out of the brakes is like standing ready in the door, even when you can't see the count. So, on larger canopies, it appears that a light touch on the brakes may help prevent collapses. However, it is not because the canopy is more stable in this configuration, but simply that the pilot is more prepared to prevent the wing from surging forward in the pitch window. Once the wing has passed through that parcel of turbulent air, however, the job remains to regain the full flight airspeed, while maintaining positive G's. Letting the wing surge back into full flight too quickly can send the wing out of the frying pan and into the fire. Get it back to speed gently, but get back there as quickly as possible. These are opposing goals, so the actions of the pilot once again become pivotal, calling upon trained skills and acute attention to sensation. Ultimately, the best way to handle turbulence is to deny it battle. Despite what your ego is telling you, you already have enough jumps. I know you want more, but sometimes the best way to go is to sit on the ground and watch the inexperienced jumpers get experienced. Live to fly another day. Brian Germain Big Air Sportz www.bigairsportz.com
-
When I started skydiving more than 25 years ago, the leading cause of skydiving deaths was the failure to pull on time, or at all. Skydivers just failed to do the one thing every one of us knew we _must_ do: pull. Education, regulation specifically addressing this issue, and not least the development by Helmut Cloth of the first AAD widely accepted by experienced skydivers in the 90's helped to control this problem… only to show the emergence of another, more insidious: skydivers were dying in increasing numbers under perfectly good parachutes, hitting the ground at unsurvivable speeds sometimes after colliding at low altitude with other perfectly good parachutes. And this happened not only to hot shots under handkerchief-sized canopies, it also affected jumpers flying conservatively under big canopies. Once more, the response adopted by the skydiving community has been to put an increased emphasis on the education of skydivers, their instructors, safety officers and DZ operators. It is here where “Canopy Control: Core Essentials” fits right in. Produced by VASST.com and authored by Chris Gay and Chris Warnock, it is aimed primarily to new skydivers. To them, it will be an invaluable tool to complement and clarify what they are learning in the first jump course. But while reviewing it I found it is also extremely useful for experienced skydivers as a refresher of basic concepts that may or may not have been adequately acquired, and sometimes forgotten, years ago. The DVD is divided in several sections totaling 55 minutes, with another 12 minutes of bonus material plus a couple of printable charts. In the beginning the host Chris Gay introduces a key concept: “the person most responsible for your safety, is you”, and it is with this in mind that one should view this DVD, regardless of experience level. Throughout the DVD the importance of different aspect of flying our canopies in relation to others is constantly reminded and related to, as a way to increase our awareness of other canopies in the air and to reduce the chances of a collision. It is also constantly reminded to seek advice from an instructor or canopy pilot coach. In the “Terminology” section, Chris Gay introduces and proceeds to explain basic terminology and concepts related to canopy flying. As through DVD, well conceived and executed graphics, both static and animated, are used to clarify the point being made. This, in addition to the even more prevalent footage of canopy pilots executing the maneuvers being discussed or explained. In “Planning and Landing Pattern”, this process is thoroughly explained. While more experienced skydivers jumping at their local DZ may not be conscious of doing it, it is a skill that must be acquired and developed. And when we are on a new DZ… well, then we all are “new” skydivers. In this regard, great importance is given to acquiring local knowledge on the peculiarities of any given DZ we may be visiting regarding local regulation, obstacles, landing areas, not to land zones (a.k.a. Farmer McNasty’s fields), wind indicators, etc. Also, it is explained how to explore the landing area and what to watch out for. The section “Flying the Pattern” follows, in which great emphasis is given to adapting the landing pattern to changing conditions. There is an extensive treatment on how to modify the landing pattern according to different wind conditions, and what to do if they change after take off. Similar treatment is given to the effect canopy traffic on the landing pattern and how to adjust accordingly, or what to do is you find yourself in the landing pattern at altitudes different than planned. And what to do if, in spite of all our planning and best efforts, we find we are not going to land where intended? That is also explained in this section. “Canopy Controls” is the most technical of the sections, in which a in-depth explanation of the diverse methods of controlling the parachute is given, as well as in what situation every kind of input is appropriate, always relating it to the aerodynamic forces involved. “Getting Back From Long Spots” deals with how to recognize the probably landing site and how to adjust the flight of our canopy to correct it in order to land in the intended site in different wind situations. It also explains the ever important how to plan and what to watch out for if we end up having to land out. “Flaring” advices on how to improve our landings. Explains how the canopy reacts while flaring for landing, different flaring techniques, and how to learn more efficiently this aspect of canopy control. The main section of the DVD finalizes with a “How to Learn More” section, in which different training aids and techniques are advised. In the Bonus section a variety of complementary topics are discussed: wing loading, technical aspects of canopies (7 vs. 9 cells, elliptical vs. “square”, cross braced vs. standard, flight characteristics of small vs. large canopies), on heading openings, packing for better openings, when to learn swooping, and finally a safety review Q & A. As a bonus of the bonus, if I may call it that, there is footage of the Canopy Formation 4-way world champion team Clean Air demonstrating what it is meant for “canopy control”. In summary, as stated by Chris Gay, “Our goal to make this DVD is to help to make you a safer skydiver”. I believe that reviewing and following the advice in this DVD, both by beginners and experienced skydivers, will certainly be a big step in that direction.
-
Skydiving has come a long way since the first (recorded) jump was made from a hot air balloon in 1797. Only being practiced as a special stunt on public events, it was far from a public sport at that point. The silk envelope used to safely descend from 3000 ft on that first jump wasn't much to look at in terms of design, but the design and materials used formed the basis for the parachute as we know it today. The military were the first to develop parachuting as an emergency escape procedure for balloon and aircraft pilots, and later as a means of delivering soldiers to the battlefield. In the 1960s, skydiving ventured outside its military use and started to become seen as a sport in its own right. As the sport grew, so did the research and development of the materials used. The harness, cutaway system and parachute itself underwent major changes and upgrades, resulting in the gear that we all now accept as commonplace as we exit the aircraft. Due to these advancements in the materials used and their design, our gear has actually passed the point where it is now safer than its end user. Getting into the sport Skydiving was once a sport which was considered pretty extreme in itself, but as the years went by, and due to the gear and teaching advancements, it became more and more safe, and was marketed as a sport for everyone. In the media, the growing attention for the more extreme disciplines and variations of our sport have led to a large group of people who no longer see the basic sport of skydiving itself as the goal, but rather as an intermediate training, or even an obstacle in the way of what they really want to do. These predetermined goals on what somebody wants to accomplish within the sport often form before or during a skydivers first few jumps. Not being a huge sport with millions of participants worldwide, we tend to enthusiastically take in new people, and sometimes pull them into our sport deeper and faster then they should be. With every year that goes by, people seem to be in more and more of a rush to jump with a video camera, downsize their canopy, learn to fly a wingsuit, freefly in bigger and bigger groups, fly head down straight from AFF and starting BASE jumping with the bare minimum, if indeed any at all, experience. Sadly, the growing trend is to encourage this behavior, and try to facilitate them in getting there as soon as they can, instead of trying to make people understand the potential consequences of the rushed path they have chosen. Photo by Costyn van Dongen Video For many,, the media creates the image that a lot of the extreme variations of our sport are things you can take up as easy as a bungee jump from a local bridge, or a ride in a theme park. When people look at some of the 'big names' in our sport, its easy to forget almost all of them put in many hundreds, if not thousands of jumps to acquire the skills, precision and experience to excel in their field of expertise. The PD factory team didn’t start swooping on sub 100 sq/ft canopies straight from AFF, just as Loic Jean Albert didn’t start flying wingsuits within touching range of cliffs after his first skydive. There are many more examples like this within our sport. Here, I think, lies our biggest responsibility: Trying to help people new to this sport understand the work it takes to reach a certain level. Trying to teach them to respect and honor the effort people put in, and helping them understand that’s what they need to do to reach their goals based on skill, hard work and determination, not do everything as fast as they can and for a large part trusting on luck to come out of it alive. Often thinking their experience or exceptional abilities in other sports set them apart from normal people, allowing them to progress much faster and skip steps. While in truth, they are exactly the people the rules were made for. Photo by Costyn van Dongen Respect the rules As with any developing sport, rules and safety procedures were created over the years based on experience. Some of the rules and safety recommendations where literally written in blood. Learning lessons the hard way. These days many people new to the sport tend to look at these same rules as a means of holding them back. Stopping them from having the same fun as the people on the dropzone who have been jumping many, many years already. We live in a fast society. Everything has to be done quickly and with instant gratification. When we experienced jumpers start talking to young skydivers about certain goals, this can develop frustrated views on the sport for some of them. They get into a mindset where they feel skydiving isn’t fun until they have their A license, or how its isn’t really fun until they are swooping a small canopy, taking up BASE jumping or flying a wingsuit. If we go along with that line of thought, and acknowledge those statements, we then suddenly turn skydiving into a point of frustration for these newer jumpers. Instead of enjoying their first few hundred jumps, and slowly learning more and more about our sport, they start seeing it as a big waiting game where they can’t wait start jumping that same tiny rig and sub 100 sq/ft canopy as the cool guys who have been around a bit longer. Photo by Stefan Smith The road is more important than the destination. Allowing people to cut corners in reaching certain goals, is not only dangerous to them, but also undermining the authority of people teaching. It’s the image more experienced jumpers portray to the newer people in our sport that determines how they in turn, will approach the sport. As an example, being in a rush and boarding a plane without a pin check is not only dangerous to ourselves, it’s also a bad example to the kid fresh off AFF who's on the same load. The same goes for many aspects in our sport. Realize that it’s not just the people who give instruction that are teaching, it’s the way we as individual skydivers approach, talk about, and treat our sport that ultimately sets an example that the new flyers will follow.
-
 Whether you jump at a large dropzone or a small one, you’ve probably shared a ride to altitude with a wingsuiter. Like all skydivers, wingsuiters should receive a thorough gear check, but a wingsuit also creates unique concerns that a watchful eye can catch. Regardless of experience level, it’s possible to make a mistake while gearing up with a wingsuit – in the same way that its possible for any of us to make a mistake while gearing up for a traditional skydive. This is a situation where your vigilance can save a fellow skydiver’s life. Here are a few recommendations that Flock U has for gear checks: A wingsuit skydiver is a skydiver first and a wingsuiter second – you will need to check his or her rig, chest strap, altimeter, goggles, etc. in the same way that you would with any other skydiver. Make sure that the jumper’s AAD is on (if he or she is jumping with one). Pay particular attention to the jumper’s cutaway and reserve handles. While a wingsuiter’s emergency procedures aren’t any different than a traditional skydiver’s, in some suits, handles can become pulled into or obstructed by the fabric of the suit. That can result in a dangerous surprise if a cutaway or reserve pull becomes necessary. After inspecting the rig, examine the wingsuiter’s arm wings – and in particular, examine the connection between the wing and the jumper’s torso. There’s unfortunately no “one size fits all” rule for arm wing inspection, as different wingsuit designs have different wing configurations. That being the case, there are several general categories of wing/torso connections that each raise their own concerns: Cable Thread Systems. Cable Thread Systems consist of a cutaway-style cable that runs through alternating torso and wing tabs, which keep the wing attached to the torso. By pulling on the cutaway cables, the wingsuiter can release the arms of the suit in an emergency. This design can generally be found in BirdMan brand suits, among others. For a Cable Thread Systesm, look to see if the cables are threaded correctly through the tabs, all the way up. In some cases, they will alternate evenly between wing and torso, but often the cable will intentionally be threaded to skip one or more tabs. Don’t hesitate to ask the wingsuiter if you’re not sure – even experienced wingsuiters may not know the proper configuration for suits that they haven’t flown before, and some wingsuiters have preferences for arranging these tabs that differ from the standard. Make sure the wing cutaway handles are properly secured in a Velcro or tuck-tab housing. Note that there’s often both a front and a rear cable on these systems - so check both, on both wings. Zipper Attachment Systems. Zipper Attachment Systems are found primarily on Tonysuit, Phoenix Fly and S-fly brand suits, though there are many different suit designs on the market that use one form or another of the Zipper Attachment System. These systems generally come in two types: “over the shoulder zippers” and “bottom of wing” zipper attachments. “Over the shoulder zippers” are what their name implies – a zipper that runs over the wingsuiter’s shoulder, which connects the wing to the torso. Generally, in this design, the wing isn’t detached from the torso even in an emergency, and the “over the shoulder” zipper is usually only unzipped if the wingsuiter is removing the suit from his or her rig while on the ground. In these models, there’s generally a Velcro breakaway or other cutaway system or a safety sleeve (described below). Look to see if the zipper is attached properly and zipped all the way down. Some wingsuiters will intentionally leave several inches of the zipper unzipped in the back, so ask before correcting a slightly unzipped wing! If the over the shoulder zipper design includes a Velcro breakaway system, check to make sure the Velcro “sandwich” is holding the top and bottom of the wing together and that the Velcro isn’t bunched or pinched – these gaps can widen when the wing encounters the relative wind. Newer Tonysuits brand model have a “safety sleeve” – a ZP liner – that allows the armwing to silde up the jumper’s arm, permitting the wingsuiter to reach canopy controls in an emergency. As a result, there’s no arm wing cutaway system to inspect. When looking at these suits, make sure that the arm zipper – the zipper that runs from the jumper’s shoulder to his or her wrist – is fully zipped. There will generally be a snap or tuck tab on the bottom of the wing; check to see if they are properly stowed. While inspecting the arm wing, check the wingsuiter’s wrist-mount altimeter (if he or she is jumping with one). Make sure that the jumper can release his or her wings without undoing the wrist-mount (which can happen, for example, if the wrist-mount is put on after the arm wing is zipped up in wingsuit designs with a thumb loop). This is a dangerous and easily avoidable method of losing a wrist-mount altimeter! Check to make sure the wingsuiter’s legstraps are on. Leg straps can be missed by wingsuiters while gearing up, as the suits tends to restrict motion and prevent the jumper from seeing his or her legstraps. Even highly experienced wingsuiters have admitted to momentarily forgetting leg straps while gearing up. When using a wingsuit, visual inspection is insufficient to make sure that the leg straps are on – the wingsuit can deceptively pull the strap against the leg, making it appear that the strap is on. Ask the wingsuiter to shrug – the jumper should feel the resistance in the harness created by tightly worn leg straps. Alternately, you can lift the bottom of the wingsuiter’s rig (in other words, under the pilot chute). If the rig moves more than a couple of inches, it’s not secure enough. Each leg of a Tonysuits brand wingsuits also has a leg zipper pull up system, which is basically a bridle that connects to the leg wing zipper. The bridle is stowed against the leg by Velcro or tuck tabs. Also incorporated in this design is a pair of magnets that keep the bottom of the wing together. These magnets must go over the zip pull ups. If they are under the zip pull up, they may jam under canopy. Are the wingsuiter’s booties on? Particularly when the wingsuiter is using a borrowed or rental suit, booties may be ill-fitting. Badly fitted and poorly positioned booties can result in a lost bootie, which can make for an incredibly difficult flight and dangerous canopy deployment. Check to make sure the bootie is on, and straight. Help to make this year a safer year for skydiving by looking out for your fellow jumpers. Making it a habit to look at others’ gear can only result in positive results. Save someone’s life this year - it could be yours! A free, downloadable wingsuit pincheck file can be found on our site at www.flockuniversity.org. This pincheck guide is perfect for printing for Safety Day or for putting on the wall near manifest. Thanks to Jeff Donahue and Andreea Olea for their help in this article. All photos courtesy DSE.
 -
I have noticed in my travels that many drop zones are a little slow these days. The student numbers are down, and we are blaming it on the economy. We have convinced ourselves that there is no way to get blood from a stone, and if the students feel broke, they will not want to spend the money to jump out of an airplane. I’m not buying it. It is true that the world is caught up in negative thinking. It is true that people are scared. But the question I would ask is this: What do people want more than anything in a time of worry? They want a feeling of release. They need to let go of their mundane perspective, filled with limitations, and do something that shifts them into a state of absolute joy. We have exactly what they need. So, now that we know we have the solution to all the world’s problems, we have a job to do. Unfortunately, just because someone needs something doesn’t necessarily mean they will take it. We need to get the horse to water, but we also need to make them want to drink. In other words, we need to inspire them. In order to do that, we need to tap into our own authentic inspiration. Do you remember what it is about skydiving that you love? If you are like me, there are a great many things. There is the social aspect; the people that skydive are the coolest bunch of weirdoes that I have ever met. If the world was made up of just skydivers, life on this planet would be a lot more fun. Then there is the unbridled euphoria that we experience when we are up there. Let’s face it, there are very few experiences that make a person feel like that. Beyond that, there is the never-ending process of learning that makes us realize that we are not done living. The more you learn, the more you want to learn. It is this kind of passion for more that draws a person out of the depressing feeling of “today is yesterday” into a deep desire to push forward into the exploration of what is possible. Once we reconnect with our true love of skydiving, all we need to do is share that feeling selflessly and fearlessly. There he goes again, droning on about fear. Yes, fear is the only thing that is holding us back from talking about skydiving with everyone we meet. Yes, part of what stops us from bringing it up is because we get a bit tired of the feeling of rejection when a die-hard whuffo gives us that eyes-rolled-back “you are crazy” look. If you think about it though, even that aversion has fear at its root. We are afraid of the feeling of rejection. If you hate being told that you are afraid, as I do, you will get off your ass and talk about skydiving to strangers. You will accept that you are in love with the whole thing, and come out of the closet. You know that this is the source of your joy. The more you talk about it, the happier you will be. Hang posters at work and hold informational meetings, perhaps with a few short videos and a real rig for them to see. Sit in a booth at a fair or university and talk about the experience to those who have not yet been there. You will be deeply glad you did. Then I often get the response: “what’s in it for me?” My DZ doesn’t have a finders-fee for bringing in new students. I’ll tell you what’s in it for you. You will get to be your higher self more often than before. You will get to keep your head in the clouds by talking about your true passion. As a secondary benefit, you will inevitably bring in more students. They will help to pay for the aircraft, the repairs to the hangar, the new bunkhouse at the DZ, the new fire pit, the new creeper-pad and even keep the jump prices reasonable despite rising gas prices. Imagine that. We can alter the worldwide trend toward fear-driven hoarding, at least in our little corner of the world. We have the antidote to fear and unhappiness. All we need to do is remember what we have, and share it. The world is in your hands. Get out there and be yourself! --BSG Transcending Fear Specialist Brian Germain is the author of several books, including Transcending Fear, Green Light Your Life, The Parachute and its Pilot, and Vertical Journey. His psychology background, combined with over 14,000 parachute jumps makes Brian uniquely qualified to discuss the important and pivotal topic that he refers to as “Adrenalin Management”. Learn more about Brian Germain here: www.GermainSeminars.com and here: www.CanopyFlightInstructor.com
-
AVCHD has exploded on the consumer and pro-sumer scene like a new star at the Oscars, and the CX100 is the newest “actor” in the AVCHD lineup from Sony. Packed into a small body measuring 2” W x 2.25” H x 4” L (including factory battery) and 2” W x 2.25”H x 5” L with the more practical NP90 battery, this small “brick” weighs in between 11 and 14 ounces, depending on the battery chosen. Short description; this camcorder is a mini-brick. The CX100 is a very small package. The lens is a 30mm thread, if you’ll be adding wide or telephoto lenses. The CX100 records a 1920 x 1080i image on a Memory Stick Pro Duo card, with record times up to 340 minutes on the included 8GB stick, but it’s more practical to record to the highest quality video in most situations, reducing recording time to approximately 40 minutes on an 8GB card, or 115 minutes on a 16GB card. There are other modes, and these are useful for recording surveillance, low motion, or even simple scenes, but for best quality, most users will likely find the 16Mbps FH mode to be the preference. Most exciting is that this camcorder brings the award-winning Exmor™ imager to the consumer world. Exmor is the heart of the professional EX-series camcorders, which have become standards in the broadcast world. What this means to consumers is a more clean image, less noise in low-light, and a smoother image overall. It’s a single .20 CMOS imager, but don’t be fooled by single and small. Technology has brought CMOS to a new level of quality that previous generations of CCD-dependent camcorders. CMOS has shown itself to be the new future of virtually all imaging devices from the very low cost cell cams to high end professional production cameras. Exmor is currently the king of small imagers. Small is the key with this camcorder. Tiny and light weight, this camcorder fits snugly into the palm. It’s very ergonomic, being curved on the right side and square on the left side. This camcorder has a manual open/close for the lens cover. The LCD panel will notify users if the Record button is engaged while the lens cover is closed. The lens housing is very simple; it’s a 30mm threaded lens with a manual lens cover. It’s a Zeiss lens, identical to lenses found on previous HDR series camcorders. Optical width (35mm equivalent) is 42mm wide zoomed in to 497mm, so the camcorder isn’t quite wide enough for action sports or close-in work, but is plenty wide for the average user. While the camcorder does offer digital zoom, like most digital zooms, it’s not terribly useful due to the small sensor sizes. It’ll work well in a pinch, on a tripod/non-moving, or in a situation where the image acquisition is more important than image quality. Exposure is controlled via menu touchscreen, as is shutter speed, although the camera does not offer full manual control. There are nine exposure modes plus an Auto mode, giving users ten options for exposure control. Two microphone ports are found beneath the lens housing. The 2.5” LCD panel flips open and rotates; there is no clasp or latch holding it in place. The panel may be closed with the screen facing out, as with all previous models in this series. This is a big preview screen and it looks terrific. The controls are very simple. There is no normal on/off switch on the camcorder; opening and closing the LCD panel turns on/off the power to the camcorder. Power can be turned off with the LCD Panel open by pressing the on/off switch found beneath the LCD panel. The buttons, levers, and ports are few on the CX100; most of the options are found in the menu options. Also found beneath the LCD panel is a one-touch Disc Burn button to burn card contents straight to a DVD via the USB connector. Next to this is found a Play button for playback modes. Even when the camcorder is in Camera mode, pressing the Play button will put the camcorder in to Playback mode. Beneath the Disc Burn button is a Display button. Pressing this button once turns off most of the displayed information, thus allowing more of the preview screen to be seen. Pressing again turns off all display items, leaving the preview screen blank. Pressing/holding the button turns the preview off completely, thus allowing this camcorder to be used in a dark room without the LCD providing a source of light. In this mode, there is no recording indicator at all. The LCD screen is the only indication of recording; the camcorder does not have a Tally light. Next to the Display button is an “Easy button” that allows the camcorder to set all parameters of operation. Manual focus, exposure, and other modes are disabled when the Easy mode is engaged. Finally, there is a Reset button to reset all parameters of the camcorder back to factory setting. With the LCD Panel closed, the camcorder has three buttons; Record start/stop, Photo, and Zoom lever. With Record Mode enabled, the CX100 is able to take continual still photographs at a resolution up to 4Mp. However, there is a time lag between shots; expect about one still every 3 seconds, hardly fast enough for many sport photography modes. The Photo button and the Zoom lever are found on the top of the camcorder. The Photo button is a bit inconvenient if the camcorder is being held in a standard palm configuration. It fits under the index finger, but it’s hard to press the button without moving the camera during video recording. The stripped-down nature of this camcorder belies its intelligence. The camcorder is extremely smart, able to sense up to eight faces on the screen and calculate exposure based on these faces. Additionally, if the still modes are being used, the camcorder can sense smiles, and shoot automatically when it sees a smile. Now if it only had an “ugly” sensor that would prevent it from taking ugly photos, or a ‘composition’ setting that could prevent badly composed photos from being taken. Maybe in the next generation. Spot focus, spot metering, slow-shutter are all available on this camcorder, along with the previously mentioned nine exposure modes. Menus are relatively simple in this camcorder, but there are some menus the average user will want to pay attention to. There is no LANC on this (or any other file-based camcorder system. Remote control is achieved through the AV/R port. Pictured here is a HypEye D Pro control/indicator system. In the “General” menu mode (preview screen/menu button, page two under the Toolbox), there are five menu options. In this menu, Auto Shutoff, Calibration, and Power On By LCD are the important options. First, disable Auto Shutoff unless you’re okay with the camera powering down after five minutes of disuse. In the action-sports world, this is a non-starter, so disable this mode. Next, calibrate the screen for your personal finger touches. Different size fingers will touch the menu differently. Next, disable the Power On By LCD option if a remote is part of the planned operation of the camcorder. For example, when using the HypEye D Pro remote/camera indicator, the LCD panel must be opened first, then the HypEye may be enabled and will control the camcorder. If the Power On By LCD option is disabled, the HypEye D Pro will be able to turn on/off the camcorder, start/stop recording, and control functions of the camcorder while the camcorder is in a box or cage. It becomes a hands-free operation when the Power On By LCD option is disabled. If a remote on/off system is part of the operation of the CX100, be sure to go into this menu and disable the Power On by LCD option. In this same Toolbox menu, you’ll want to scroll to Page One of the menu options, and select the Face Function Set menu. Disable Face Detection, and disable Smile Shutter features. This will significantly speed the auto-focus functions of the camcorder. This same menu is where you’ll set the movie or photo modes of the camcorder. In the next menu, you’ll want to set the camcorder to record to external media, unless you’ll plan on downloading everything from the internal memory to an external hard drive. There is a huge benefit to this process; if you’ve filled or forgotten a memory stick, now you’ve got a way to record. Imagine being on a cliff wall or aircraft and realize you have no memory stick, or the stick is full. Simply switch to “Internal Memory” mode and you’ve just gained nearly 60 minutes of high-quality recording in FH mode! Be certain to enable X.V. Color in the menu for the most rich and natural colors during playback to any X.V. enabled HD display. X.V. is standard in Sony displays, but XVYcc is an up and coming standard in home video/theatre. The color information is embedded in the video stream, and having it will not harm the image of non-XV (HDMI 1.3) systems, but will be immediately apparent in XV displays. Disabling Automatic Off will be important to action sport photographers. If you need to share media, no worries. You can easily dub media from a mem stick to the internal Flash memory, or dub from the internal Flash memory out to a media stick. If Firewire has been your primary means of sharing video files, MSPD is now your transport medium for sharing video. From skateboarders to skydivers, this feature will be much loved, much appreciated, and much late in file-based recording systems. "The Sony CX100 with incredible HD quality in such a small form factor complemented by electrical stabilization and solid state media; is the best camera on the market for daily capturing skydiving and other action sports." Mark Kirschenbaum – Get Hypoxic/Skydiving Videographer Another ‘feature’ of this camcorder is the image stabilization system. For the past two years, almost all Sony models have been Optically Stabilized, or OIS. This is terrific for those that stand around with camcorders in their hands, but for those that are mounting camcorders to skateboards, helmets, aircraft struts, motorcycles, or anything else that has heavy, inconsistent vibration, OIS is a bane, not a benefit. Soft, juddery images are sometimes the result of OIS systems. The CX100 offers EIS, or Electronic Image Stabilization. Granted, for those that stand around with camcorders in their hands, EIS may not be quite as preferable, but for everyone else, EIS is golden. Action sports photographers have been begging for EIS to return to small-format camcorders. Sony has finally obliged. The bottom of the CX100 offers a metal-threaded/encased tripod mount with a removable bezel. All in all, the Sony CX100 is a dream camera for the low-budget videographer, the action sport photographer, or the independent production looking for a crash cam. At a retail of 599.00, its street price is somewhat lower, and available everywhere. In Black, Red, and Silver, there are even multiple color choices for the color-coordinated videographer/photographer. There is little to want for, given the size, weight, and cost of the CX100. The CX100 is very small, and will fit on any helmet camera mount system. Consider using gaffers tape to hold the battery if the mounting system does not support the battery bottom. Cookie Composites has announced they'll offer a box for the CX100 around the same time the camcorder ships. (pictured helmet is a Cookie Composites ROK) Weaknesses are found in the potential “oops” factor of leaving a lens cover on while using a remote, and in the opportunity to miss menu options in a hurry. Lack of audio input means extra care should be taken to capture decent sound; if a housing is used, be sure to leave an opening for audio. These are small pitfalls for the large scope of what this mini-monster brings to the table. Congratulations to Sony’s design team; in my estimation, this is the best small-format camcorder for the buck. Ever. ~dse
-
From Student to the 100th Jump Making it to my first Nine-way and then suddenly being welcome into RW jumps During early 2005, I became interested in big ways while I was still a student skydiver. As a deaf person, I discovered the deafskydivers.org website, and they were planning an upcoming Deaf World Record event. They required 100 jumps and a B license to participate in the event. A daunting goal, this gave me the incentive to jump as often as I could at my home dropzone. At jump #99, the largest formation I had ever jumped in was a three-way. For my next jump, I set forth trying to get the biggest RW formation the drop zone would let me build. This became a nine-way, made mostly of Skydive Gananoque's instructors. For my 100th jump, we created a successful 9-way jump even though I funneled the exit! Before this jump, I had a hard time finding willing RW buddies. Word went out I'd accomplished a two-point nine-way. Now I was suddenly being invited into four-ways, five-ways, and six-ways, jump after jump! As a result, my learning experience experienced a big bang after this milestone jump. photo by Dave "Fuzzy" Hatherly Deaf World Record 2005 First experience being “cut” from a bigway event November 2005 was my first skydiving vacation. I flew to Florida to participate in Deaf World Record. It was like a deaf boogie, organized by the infamous Billy Vance and John Woo. Before the event, I went to Skyventure Orlando for the first time. I was floored to learn that John Woo had 20 hours of tunnel time, and is a World Team member having completed the 357-way World Record the previous year. He told me he had about 700 jumps. His story was an inspiration, even if it was an impossible dream at this time. Over the next few days, 20 of us jumped several attempts to break the 14-way2003 record. I learned a lot, and docked on several formations that exceeded the size of my 100th jump formation. Eventually, they had to give “the speech” to four jumpers to reduce subsequent attempts to 16. I was one of the people to be “cut” from the final formation. My feelings of disappointment disappeared as I witnessed the Deaf World Record from the ground, the subsequent first night jump, and giving my glowsticks away. The photo with the goofy smile tells the whole story of Deaf World Record 2005 experience. Attending Canada Big Way 2006 Failing to get to the 59-way level, but managing to get to the 30-way level I learned about the Canada Record during late 2005, and wanted to see if I could possibly qualify for this event. It seemed far fetched that I might participate in an 80-way but I kept my mind open. During 2006, I completed my first 20-ways during boogies when the Twin Otter visited my Cessna home dropzone. The dropzone told me to go and attend the Canada Record anyway, to 'try out' and see if I was good enough. At this event I had my first taste of big way education, such as stadiums, radials, sheep dogging, red zone. Alas, I was cut before I went past a 21-way. The event proceeded to complete a 59-way while I jumped a side 20-way camp for people who were cut from the main formation. I learned many valuable lessons, including from Guy Wright: Never look up when I fall low. After that advice, despite still being a sloppy flyer, I consistently recovered from falling low during these jumps. I made many bad impressions with Guy Wright, however, TK Hayes invited me to participate in a 20-way. Later, it became apparent there was too many jumpers, and it became two separate 30-ways instead. This became the consolation prize: My first multiple-plane formation load, and my first 30-way, that I completed, docking 14th. Guy Wright's Big Way Camp 2007 Struggle trying to stay current During 2007, I had a major downturn in my jumping frequency due to job and love life situation. Nonetheless, I attended a Guy Wright big way camp at the same dropzone as the Canada Big Way 2006 event. However, I got cut very early during the first day as I was very uncurrent and my previous impression at Canada Big Way 2006. In addition to my lack of currency, I had also gained weight, so I had much more difficulty falling slow, so I kept falling low too often! Discouraged, I gave up on big ways for the remainder of 2007 except for the easy 20-ways that occurred at Gananoque's Twin Otter boogies. Perris P3 Big Way Camp May 2008: Finally Persistence Wins! Finally reaching the 50-way level In the previous two years, I kept hearing about the famous “Perris Big Way Camps” as being the best camp to learn about big ways. I was getting current again and I worked a little over an hour of tunnel time and 20-way jumps previous to the camp. Finally having the prerequisite jumps, I attended the Perris big way camp for May 2008. They require 250 jumps with 50 jumps in the preceding 6 months. It was to become the best skydiving vacation ever. As a deaf jumper, I was very challenging to the Perris P3 team, because I often required a little more maintenance than everybody. Load organizers dislike high-maintenance jumpers, and it was always a challenge to make myself as low maintenance as possible. I was struggling trying to learn as much as possible, with the help of other jumper writing notes for me! I persisted and climbed my way through ever-bigger formations, and the final jumps on the final day, I was to become part of an outer weed whacker (“weed whacker of last resort”). On the third last jump, I fell low. On the second last jump, I successfully docked but others in my whacker did not make it. I approached a discouraged-looking guy and encouraged him, good job, you can still do it. He was a guy, very much like me, who was trying so hard. I gave him a good pat on the back and gave him the encouragement. The thrill of diving fast from a trail plane, and slowing down on time for a dock. I almost fell low on this jump, but I docked – DOCKED! Then I committed the sin of looking away from the center and to other jumpers docking on me. He was struggling, going to fall 1 foot low below me – but I made a last minute decision to drop my level slightly below, while still docked, and help catch him. We docked in a mutual grunt of effort. Right in the nick of time, the final person, about to go low too, caught the very end of the weed whacker and promptly pulled our entire whacker low again, a whole 2 feet below the formation level, with the chain becoming almost diagonal! However, we quickly leveled out without funneling. We DID IT. I was sloppy, the video showed my instability as I caught the other skydiver, but I felt I played “hero” on this jump – helping other new big way jumpers like myself complete the formation. While I was not ready to truly play the role of hero, I had so badly wanted the formation to be complete – and it was my job in the weed whacker of last resort to try to make it succeed. On the other hand, skydivers are supposed to look towards the center of formation. Despite this succeess, I still had lots to learn. But it was time to celebrate – I was so happy I was part of a complete 49-way formation! photo by T.C. Weatherford Perris P3 100-Way Camp September 2008 Now reaching the 100-way level By now, I was starting to think I might make it into the next World Team if I tried hard enough. I started to hear that the next World Record might be happening in year 2010. I then made a decision to gamble and “go for broke” for the Perris P3 September camps, and try to bring myself to the 100-way level. The Perris camps were organized as a 50-way camp the weekend prior and a 100-way camp the weekend after. I had only gotten a conditional invite for the 100-way camp based on the performance of my 50-way camp, but planned my vacation as if I was going to possibly be accepted into the 100-way. As a deaf skydiver, I hunted down interpreter help to try and decrease my maintenance level even further. Jan Meyer stepped up to the plate and offered to be my debrief-room interpreter and to double as a dedicated big way coach. I surpassed the performance of my previous Perris May 2008 visit. It worked – I qualified for the 100-way camp. The next week, I finally did my first 100-way as I had dreamed of doing someday. The Future... Even though I am still very much a relative newbie to bigways still yet to be part of an invitational big way event, I now have a new goal: Be part of The World Team within my lifetime, whether in 2010 or later! Although I now have enough experience to be invited to the smaller invitationals listed at the bigways.com site, I still have a long way to go, and lots yet to learn!
-
CANOPY FORMATION PARACHUTING - CF (Part 2)Part 1 may be read here Packing the Canopy You will want to pack your canopy for a CF jump in a way which will ensure that: it opens fast and reliably it opens on heading all canopies involved open with identical timingA good way to achieve this is to pack the main similar to a reserve canopy, as the requirements for a reserve opening are about the same. Indeed, many CF teams do so. Since there are different methods of reserve packing, it is recommended that all jumpers involved in a team or group should use the same packing method for safety reasons. Doing so reduces the probability of collisions and unintended different opening levels to make sure that each team member has an optimal set up for his way to the formation. Type of Exit and Exit OrderA good exit speed is 70 to 80 knots with little prop blast. Newcomers to CF will enjoy greater success if the jumpers exit one after another in the same way students perform “hop and pops” and remain stable. It is essential to remain in a symmetrical body position until the canopy is completely inflated to assure that the canopy opens on heading and continues flying straight until you want to fly your pattern towards the docking position. With experience comes a tighter exit timing, and this practice becomes even more important. If your canopy does not open on heading you can easily end up in a dangerous collision or at least in a bad position during the approach to the formation. Also, other jumpers can be disturbed as they try to avoid the errant canopy. In general you will exit in the order of your position in the formation. Competition teams might use different techniques to speed up the build of their first formation. TimingTeams with more experience will eventually develop an exit with two or three jumpers standing in the door, jumping with only very little delay, and pulling in sequence to create a perfect set up for the build of their first point. In this type of exit, the last jumper leaving the plane (front person in the door) deploys first. The next jumper deploys when he can see the beginning deployment of the jumper above. This leads to a set up with the lower canopy slightly in front, which creates a perfect set up for a final approach. Set-Up for Building the FormationIn most cases it makes sense if the person flying the Base sets up on heading, flying with a little brakes and slightly lower than the jumpers that will dock next. That gives the next jumpers the potential to fly to their docking position because altitude is our fuel. A good position for the final approach of a single canopy is slightly higher and to the side (perhaps slightly behind) of the canopy to dock, onflying parallel with it. The optimum setup of course depends on the flight characteristics of the formation to dock on. For docking on a fast sinking formation, it’s probable that the setup will be lower than for docking on a floaty formation. The necessary experience to estimate the perfect set up will only come with the jumper and quality of your jumps Body Position Fig2.1 To keep your canopy flying straight with even controls, body position must be symmetrical. Shoulders should be square and arms in a “box position” with legs slightly spread and bent as shown in the sketch of a stack. If you lift one leg from that position while stretching the other one your canopy will start to turn towards the stretched leg. If done with intention, this can be a useful tool. For example, a stair step formation might benefit from stretched-leg control. Bent legs also provide the potential to compensate for tension in a formation and to dampen oscillations. Reducing AltitudeWhen getting into the setup position for your final approach to the formation you may find yourself higher than desired (if your are too low or far behind you won’t be able to get into the formation). There are different ways to lose extra altitude without using much space. It always makes sense to stay in a small area because long distance movements take much more time. Additionally you may interfere with the waiting position of another jumper. Furthermore, you might have difficulties estimating your exact position. Below, you’ll find methods of losing altitude. Cross ControlsIf it is important to use very little space, you can easily lose altitude by using cross controls. That means you’ll pull down one front riser, then compensate the move your canopy would now make by applying the toggle on the opposite side. Because the canopy is being distorted it sinks and will pick up speed to the distorted side. The toggle action evens out this momentum so that the canopy ends up sinking in place, assuming that the right balance is applied. Doing so you can get into the desired set up position for your final approach without disturbing another jumper in his set up position close to the formation. Rear Riser StallA similar result can be achieved by performing a rear riser stall. To do so, you grab the connector links on your rear risers and pull them down carefully. This is not very hard to do. Because the main part of the lift is being created in the first third of the profile where the A- and B-lines are attached to the front risers, this is a fairly light pull.. At first, the canopy will begin glide flatter without losing much speed. This range can be useful if you find yourself far away from the drop zone on a down wind flight pattern and want to get as close to the DZ as possible. If l the risers are pulled down a little further, the canopy will smoothly begin to stall and sink very fast. This technique can help to lose a lot of altitude. However, it should be practiced with only two jumpers involved before being used in a big way jump. It is not recommended in a tight echelon as the canopy may come out of the stall bailing out to the side, and interfering with others in the lineup. Rear RiserIf you are too low and need to gain altitude on the way to your waiting position, or if you’ve gotten behind the formation, you can use very light pressure on both rear risers to fly a fatter path without losing much forward speed. This has to be done very carefully because it you pull them down too much you will lose speed and only millimeters further, end up in the rear riser stall previously mentioned. About the oldest technique to lose altitude is the “sashay.” The sashay begins with a radical toggle turn away from the formation and then a reverse movement as soon as the canopy has tilted to the side; this movement is stopped out with both toggles. It is not very efficient, utilizing a lot of area and you may lose track of your position relative to the formation. It takes a lot of practice to get good results with this radical maneuver. Over the TopAlso from rotations comes the “rotation over the top“. The move begins with going to deep brakes quickly. As soon as the canopy rocks back grab both front risers and quickly pull them down without letting go of your toggles. It takes less force than you might expect because if done at the right moment, the front riser pull will coincide with the canopy having almost no lift and no tension on the lines. Next, you riser down little further than your final destination, release the risers, and swoop into your docking position by using the toggles. Today some successful teams are using a combination of the two techniques mentioned above. However, these should be considered advanced skills, to be discussed in another article. Techniques for ApproachesThe most challenging part of a CF jump is the build of the initial two-way formation or the dock on a single canopy. Remember, a formation will usually not perform as well as a single parachute. Docking on a larger formation always gives you a little extra performance relative to the formation since you have a single canopy with all of its lift potential. Good technique(s) is/are required to dock with a single parachute of similar performance. That means you’ll need to gain some momentum when attempting to dock on a canopy flying by itself. The only way to do so is by setting up higher and not too far behind the canopy you’ll be docking with. The canopy to be docked upon should slightly hold brakes to make things easier. The docking jumper begins his approach setting from a position with his feet approximately at the level of the canopy he’s docking on; slightly behind or a little to the side. The approach is initiated by using front risers to pick up speed and controlling the direction of flight. Now pilot the canopy to a position slightly lower and slightly behind the final docking point. The final move is performed via toggles (reducing speed), swooping up to the desired level, and aiming the docking cell to the desired position (center cell for a stack or end cell for a stair step). It is essential not to have too much energy left when docking and also not to end up too low. If you end up too low the dock will fail. If you find yourself having too much left-over energy, you should abort the dock for safety reasons and use the potential energy to fly to a good position for a new setup and another attempt. Building the FormationsIn principle, there are only two or three ways of making approaches. Building a StackTo build a stack, the jumper who is docking sets up slightly behind and above the canopy he’s docking on while the jumper to be docked upon flies straight holding a little brakes. The lower canopy stays in brakes until the docking center cell has touched his back. If the dock is perfect and he has some experience, he can take foot grips hooking his feet behind the center lines. If not, he can release his toggles and grab the docking canopies nose get it into the right position and then take the foot grips. Having done so, the lower canopy pilot gets back on the toggles to control the formation. Never release the toggles before the docking canopy has actually touched you because if you do, your own canopy picks up speed and flies away from the canopy trying to dock. In any case it is important that he releases both toggles evenly to prevent the formation from spiraling. It is also very important that the docking pilot can see at least the lower legs of the jumper he’s docking on. Should the legs become shorter and shorter you need to add more brakes. It an absolute NO to pass under a jumper you intended to dock on. If you have the impression that this is about to happen you must abort the attempted approach by either stalling radically or turn away with one front riser pulled down. It can be extremely dangerous to fly underneath and in front of a formation because your burbles can cause canopies in the formation to collapse. Also you could lift up with the middle of your canopy under the jumper you wanted to dock on ending up in a wrap. That means if you perform any kind of dock on a formation you have to be in full control of your canopy at all times and able to abort if not. Otherwise you are not qualified to do CF jumps. Fig 2.2 If the docking canopy ends up higher than wanted, it’s not necessarily a problem. The docking jumper can park his canopy with his nose in the center against the lines of the top canopy and slide it down by moderately using his front risers until the top jumper is able to reach for his grips. Approaches to lower positions in a stack or plane will need a lower set up than for high positions because the formation begins to sink more with its size - especially the “plane” formation. Speed teams may still want to dock positions three and four from a higher position and perform a riser dock by aiming their slider to the jumpers feet instead of the center cell. Building a PlaneA plane formation begins with a stack. Next, the top jumper climbs down the center A-lines and once the slider has been reached, he now hooks his feet behind the front risers of the lower jumper. The lower jumper helps by putting on some brakes to increase the lift of his canopy. If the top jumper needs to pull himself down on the A-lines, it must be done with uniformity to prevent the formation from oscillating sideways. Building a StairstepThe Stairstep is the second basic type of formation. The technique for building a stairstep dock is similar to the techniques explained previously but because the Stairstep is far less solid than a stack or plane, everything has to be done with lighter input and greater precision. The set up for the final approach is slightly to the side of the formation. To make a clean straight and precise dock you’ll want to keep it relatively short with not too much potential. You may start with one canopy width to the side of your target canopy and your canopy slightly lower than the canopy to dock. The approach should be from the side rather than from behind so that the jumper to be docked upon has a good view of the line he wants to catch as well as remaining in the clean air to the side of the docking canopy. Also in this type of dock you should never get too low or lose sight of the target. The docking end cell should end up at the hip to the shoulder of the docked body. The docked jumper can now hook his outside foot behind the outside A-line of the docking canopy with his body staying outside the docking cell. If the grip taker should need to use a hand grip to guide the docking canopy to a good position for taking ther foot grip he has to be well aware to maintain his body position in the harness to prevent unwanted influence on the flight of his own canopy. The docking pilot puts on some outside front riser trim as soon as the top jumper has taken his grip to prevent his canopy from coming up on the opposite side. After having set his canopy by doing so he may release some of that trim or maybe even all of it. Sometimes it gives you enough trim to stretch the outside leg to keep the bottom canopy flying nicely. Sometimes no further trim is needed any more but still you should keep your hand on the outside front riser ready to apply trim again if needed. The set up for stairstep docks in lower positions may be somewhat lower. None-the-less be aware that a stairstep formation flies fast and flat compared to other formation types. If your setup is too low your docking time may become very long. The build of the stairstep, stack, or plane can of course also be done in reverse order with the lower canopy flying in little brakes and being the target and the top canopy flying the approach. The technique is referred to as the Top-Dock and will be explained with techniques of sequential CF later on. Flying in the FormationAs in free fall skydiving you have to keep on flying after you docked. In a stack for instance, especially in the bottom position, you need to make sure that your canopy does not get too light and floats up. All canopies should have slight tension on the center A-line to make the formation healthy. In a plane it is important that all cells of all canopies are inflated. If not the jumper in question can reinflate his closed cells by putting on some brakes. Perhaps he will also have to maintain some toggle trim to keep his canopy’s nose open. Also a jumper next to a closed cell can help by pulling the nose open. Good awareness is needed in formations with stairstep grips like stairsteps, diamonds or boxes. Especially jumpers in lower positions need to always keep their canopies from coming up or around. Possible techniques are: outside front riser trim asymmetrical leg position and inside toggle. Signals within the FormationTo signal information to other jumpers in the formation there are two ways. You can either shout a command by addressing the jumper with his name or use certain signs. In bigger formations it is more convenient in most cases to use signals instead of vocal communication to avoid noise and confusion. The signs and commands to use must be known well to everybody. In case of vocal information you must never use negative commands. If for instance you shout “don’t cut away!” and the other jumper misunderstands he will cut away. In this case you should have said “hold on!” for example. In large formations there are two very useful signals to the jumper below you: Twisting your foot sideways means the jumper whose canopy is on that foot needs to get lighter for example by putting on some brakes or easing the front riser pressure if possible. Shaking the foot vertically means get heavy which means put on some front riser pressure or signal further down if the jumper(s) below is (are) light on you as well. Piloting a FormationStack and plane formations always follow the top canopy and are controlled by the top jumper also called the pilot. The stair step needs more caution than the stack because it is connected less stable. Diamond formations act similar but in bigger formations the pilot might need some assistance by all the out side wing people to help keep the formation flying straight or to help turn the formation. Bigger diamonds are fairly inert. It takes some time to make a big diamond turn. The most attention is needed in stair steps. In a turning stair step the bottom jumper always needs to compensate the change in the flight characteristic of the turning stair step versus the straight flying one. If the formation is turning away from him he needs to release some of his outside front riser trim and if the formation turns towards him he needs to increase the trim on his outside riser. Because the links in a stairstep formation are similar to pivot points these formations need to be turned very carefully. Separating a FormationSeparating a formation needs at least as much attention as building one, especially for safety reasons. Also should it be done high enough. Bigger formations should be separated at 1.500m (5.000ft) and smaller ones at 900m (3.000ft). Small formations can be split in reverse order of building letting go one jumper after another. The jumper whose turn it is to go shouts the names of the ones holding him and they drop him. Then he clears the proximity of the formation immediately to give room for the next jumper to leave it. Larger formations in the shape of a diamond of up to 36 jumpers can be split by using a technique called STARBURST. The starburst is being started by the designated person calling “starburst! - starburst!” which is to be echoed through the formation. Then one person starts a count down calling “ok – ten, nine…..two, one, break!“ Everybody else joins the count loudly to make sure that everybody is able to hear it. On “one” everybody get his hands on the controls and on break lets go of the grips to fly out of the formation radially away from the center. Peter A. Pfalzgraf Rheingaustr. 24 12161 Berlin p.pfalzgraf@gmx.de
-
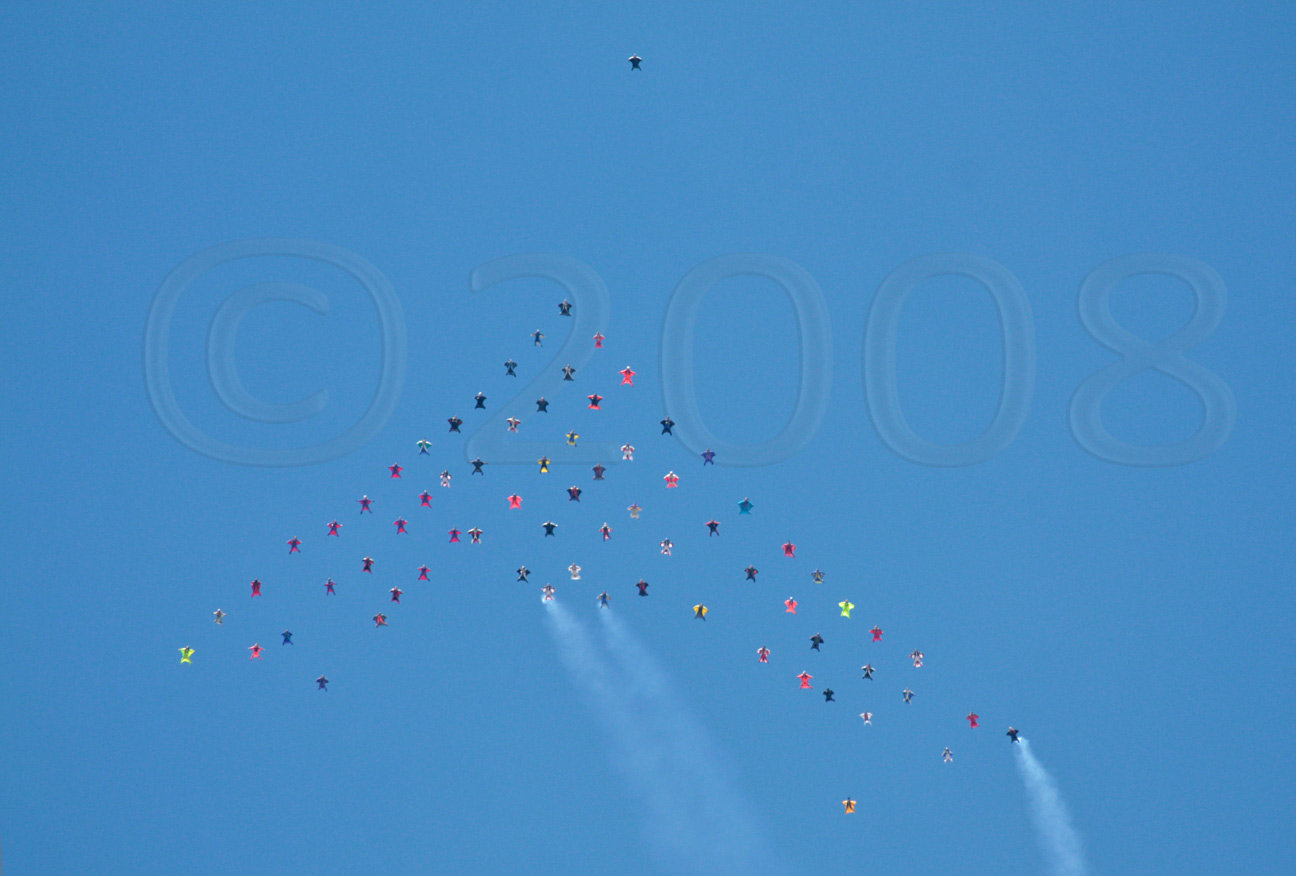 In November 2008, 71 wingsuit pilots flew in a stealth-bomber-shaped formation over Skydive Elsinore. It was the largest slot-specific formation in the short history of this emerging discipline. But how did the event, which was billed as a “Wingsuit World Record,” change the future of wingsuit flying (if at all)? In a discipline still unrecognized by the FAI and the Guinness Book of World Records, what does it mean to try setting new standards? 71: Achievement and FrustrationThe idea of a big-way wingsuit record was not new. The most notable previous event was in Cochstedt, Germany in July 2006. Organizers there sought Guinness recognition for the largest number of wingsuits exiting on a single jump run, out of an Antonov 72. In contrast, the 2008 71-way at Skydive Elsinore was a purely invitational event focused on slot-specific flying in a four-plane formation. A diverse international team reflected a worldwide growth in the discipline and a global desire to achieve something recognizable within our sport. Hailing from as far as South Africa and Russia, participants from 14 countries qualified for a chance to fly in the big-way by demonstrating their skills at official camps and through a referral system. Five were women (the few, the proud, the only gender not to have a single member axed from her slot!). The skydiving press (the French ParaMag, British Skydive The Mag and American Parachutist, among others) extensively documented the event. The 71-way marked significant achievements as well as frustration. In the achievements column, the team flew a new, wider spacing that reduced oscillation and movement within the unlinked formation. This led to multiple smooth and on-level jumps that looked beautiful from the ground. The previous slot-specific record recognized within the wingsuit community was a 16-way diamond. Like that formation, most small groups had employed a “head-to-foot” spacing technique that encouraged proximity but usually resulted in trailing flyers at the back and reactive vertical motion within the flock. The scope and level of organizing, while it left much room for improvement, was also a check in the achievements column. While there was some initial grumbling about the level of seriousness and the pushing of safety standards in communications to team members prior to the event, most participants expressed relief that the 71-way jumps would be a focused record attempt and not “just another boogie”. Frustration arose when it came time to judge whether the group had succeeded in setting a “world record”. The initial goal was to have each wingsuit pilot flying within three-square-meter boxes arranged in a grid that would be superimposed over still photographs of the formation. The organizers’ proclamation of success was based on a photograph where all flyers were either fully within or touching at least one edge of their three-square-meter grid square. However, without an outside judging structure, heated discussions escalated the meaning of “success” and the best way of judging unlinked formations into a full-throttle debate. Beyond R&D;: 100 over ElsinoreThe debate about how to judge large wingsuit formations will continue unabated until an outside governing body agrees to recognize one set of objective criteria. The 71-way was destined to be a “work in progress” since it had never been done before. With the lessons learned from the experience, an expanded organizing team is preparing for a 100-way wingsuit event at Skydive Elsinore from November 7th to November 13th, 2009. While some ask whether trying to set records before there are established categories is futile, skydiving is not a sport that waits for mainstream approval in order to change and grow. Wingsuiting is an especially entrepreneurial and fast-growing subculture. The hope is to continue safely demonstrating what is possible. In doing so, organizers strive to create events that excite new skydivers and unite those already committed to wingsuit flight. Armed with evidence from last year’s judging attempts, big-way organizers are prepared to continue lobbying both the FAI and Guinness. The 100-way five aircraft formation is invitational. Skills camps are planned between now and July, when official qualifying events begin. A specific Skills Checklist sets out minimum jump requirements and what exit, flying, and canopy skills potential participants need to practice and perfect in order to gain a spot on the team. For more specific information about the 2009 Wingsuit 100-way, go to www.wingsuitworldrecord.com. Numbers and RecognitionOfficial recognition of wingsuit flight as a skydiving discipline will bring a clear judging regime – and therefore, is ultimately necessary for long-term growth. Competition drives our sport, and desire to achieve recognizable goals is at the heart of every team. Whether with the versatility and creativity of vertical relative work or the sheer size of the formation World Team, standards and rules (some made to be broken) compel excellence and progress. In the current vacuum, setting new standards and claiming achievements without official rules is difficult but necessary. The 71-way, for all its imperfections, spurred the wingsuiting community to more seriously consider how it wants to be judged. It also demonstrated that such events have the potential to recruit serious sponsorship and interest from both new skydivers and experienced jumpers in other disciplines. That’s the future.
 -
 By Ian Drennan I wasn't really sure what to expect when arriving at Deepwood Ranch in Deland for the PDFT Tryouts. So much of my skydiving career had been spent preparing for this moment, yet when it finally arrived I felt very unprepared. I can't deny that going into the event I was in competition mode, not sure what to expect, but sure I was going to give 100% no matter what they threw at us. Little did I know that this would feel, and be, nothing like a competition, and nothing like anything I'd ever experienced before... After a brief welcome by the PDFT we were all taken to a house where we were given free rein to divide our living space as we saw fit. The mood was good; everyone was excited, and nervous, as to what the coming days would bring. Surprisingly when it came to picking living space, most people gravitated towards the people they'd never met or had spent limited time with. There were of course, requirements for each area - thankfully our space was dubbed the "No Snoring" zone :) I had expected the atmosphere to be tense; there was so much unknown and so much riding on this event for each and every person there. Yet the mood was upbeat and encouraging - the tone for the week had been set. We woke on Tuesday morning, way earlier than any human should have to be awake (that's 6am for me... what can I say, I'm not a morning person!) - still, the rooms were abuzz with excitement and everyone anxiously scurried out to start the day. After breakfast the introductions began, lead by the PDFT and John LeBlanc (who blew off a meeting to spend more time with the group!). As the introductions progressed, each participant revealed more and more about their background, upbringing, and motivations behind pursuing this dream. This 3+ hour experience flew by as, surprisingly, people quickly took to a "heart on the sleeve" approach, laying out their innermost insecurities, fears, thoughts, and dreams.Once the introductions were done, we were assigned groups (picked by the PDFT) of 5 people. Each of the 3 teams was then assigned a task: prepare a group presentation on a set topic (each group had the same topic) within the hour, and each team member was required to spend an equal amount time speaking. This exercise quickly allowed groups to get a feel for personality dynamics within each team and, hopefully, learn to work as a group. Well, I can't speak behalf of the other groups, but Group 3 rocked the house :) I was lucky to be paired with a fantastic group of people, all bringing different strengths to the table. The groups were not just responsible for a single presentation, but rather were together for the week and assigned different duties for each day - dish washing, cooking, or grounds maintenance that would be done in between the scheduled activities for the day, and interviews. Tuesday night was brought to a close by the group’s first rock session. Much like the Native American Talking Stick tradition, this concept allowed people to voice opinions – uninterrupted - discussing themselves, their teams, the day, or anything that sprung to mind in a positive, or negative, fashion. Once again each individual surprised me with their honesty, and their ability to take constructive criticism. Around 11pm, after a long day, we packed it in and went back to the house - exhausted.....I don't think I've ever seen so many skydivers in bed at such an early time :) Wednesday we woke to poor weather, so the group took the opportunity to do their individual presentations. We were entertained with a variety of topics, from cooking, to building water towers, to snowboarding, juggling, fresca ball, and even how to hot-wire an airplane! Each member added their own personal flair. I think it was here that it really struck me what an amazing job the PDFT had done selecting the 15 members. I remember looking around and realizing how level the playing field was. Each individual was strong in different ways, and it was clear that the team could pick any 4 and still have a spectacular outcome. After the presentations, everyone blew off some energy by playing some of the newly introduced games or learning to juggle. It was quite a sight to behold. Group 3 took to cooking that evening, and with little deliberation began the cooking assembly line. Surprisingly, Travis Mills (from group 2) joined us in our food preparation. Travis, a onetime sous-chef, took the time to help us rapidly prepare our ingredients (that man is a chopping machine!!). I began to notice how well we were working together. As usual, after dinner, everyone sat around the fireplace, chatting, trading stories, etc. It was here that JC took it upon himself to introduce Zip-Zop. Every single person participated in the game (despite enormous suspicion), including Jay, Ian, and Shannon from the PDFT! I won't ruin any surprises, but needless to say - JC is a prankster....oh, and JC if you're reading this....I'm plotting my revenge... On Thursday we woke to beautiful weather. The energy levels were almost uncontainable....we were finally going to JUMP! The team had something special in store for us today: We were going to do a mini-competition. After a few practice rounds the competition started - interestingly enough, the mood wasn't competitive; it was supportive. I can't speak for others, but I've never felt so relaxed before. Each round was just downright fun. The highlight, for me at least, was the expression round - not an event I normally do well in, so needless to say, I was elated with the final outcome. After the competition it was back to chores where our group was to help Kim, the land owner, chop wood for his house (and our fire pit). It was here that what was happening really became clear to me. Our group was unable to audibly communicate, since Tommy D was using the chainsaw to cut wood. But somehow we still needed to work together to load up the truck and get a system going. We fumbled a bit the first few minutes, each struggling to find our place....but then, something happened: We began to draw on what we knew of each over the last few days and created yet another assembly line - seamlessly operating in unison. We actually got so efficient that we chopped, and loaded, and entire truck full of wood in 20 minutes all with minimal communication! Returning from the wood chopping experience, I was summoned to my interview. This was it, this was the moment to shine in front of the team, and give them every reason why I should be on the Expansion Team. I consider myself fortunate to have competed, and become friends, with the team before this day - yet it was still intimidating. I cannot imagine how some candidates, who'd never met any of them, felt at that table. The team was warm and welcoming though, and it felt far more like a discussion than an interview. Offering up direct questions and answers, I felt I represented myself well. I walked away with a smile thinking that good things were coming... and then it hit me, and it was like getting hit by a Mack truck. All these doubts entered my mind: "What if I get offered a slot, can I live up to the public expectation of a team member?"; "What if I just blew it?", etc. You see, in all my dreams of becoming a PDFT member, I'd actually never stopped to think what would happen if I actually got it. I know I wasn't the only one. I didn't have too long to dwell on my insecurities since the night's activities were about to start after dinner. This time JC once again had an icebreaker game. This one was more a mind game, and boy did he mess with my mind :) The rules of the game were simple: You had to figure out the rules of the game, and when you did you had to guide (but not tell) players who hadn't figured it out yet. Much to my frustration I wasn't getting it and, as more and more around me figured it out, my frustration grew. Fortunately, Ryan was the most frustrated and, in a fake temper tantrum, provided comic relief. It was now time for our Rock Session. The team once again kicked it off, providing examples of how negative, but constructive, criticism to other teammates. Surprisingly, the candidates sessions remained largely positive. It was a very emotional experience for everyone involved. Drained and filled with self-doubt, I headed to bed. Friday morning was the first morning all week, that no one was on time to breakfast. Mentally exhausted, and nervous, we gathered ourselves and headed out for the final day. The mood was definitely serious - we all knew what was happening today. We kicked off the day with a grueling exercise: We had to pick who we thought the new team should be, as well as a 'heart' team made up of 3 other people we'd love to fly with and then explain to everyone in a few short words, why we made the choices we did. It was here we got a tiny taste of what the PDFT was about to go through. It was incredibly tough to pick so few people from so many qualified people. In the end, after everyone's choices were vocalized, the choices were spread evenly among the group - this was definitely not going to be easy. Deciding to jump, each group got paired with a PDFT member and did a formation jump. The exercise was in trust, and it was here I noticed that I needed to be more trusting of my teammates in the air. Time was now out though and the PDFT needed to go and deliberate, and while they deliberated gave us carte blanche to jump and do whatever we wanted to, to blow off steam...and blow off steam we did :) I took the opportunity to work on my trust issues by encouraging everyone there to swoop me while I sat in a kayak on the pond - after all, if I couldn't trust these people, who could I trust? It was one of the most enjoyable things I've ever done in my life. I had my own swoop show, with each person trying to outdo the other on the pond. It was total and utter carnage - and it was great! My favorite memory is of Travis Mills screaming by doing a ghost-rider with the biggest smile I think I've ever seen anyone have. After a quick hike through Deepwood Ranch, it was time to return to hear the final announcement. The team arrived a few minutes later than expected, with a somber, yet relieved, look on their faces. It was clear they'd made a decision. Addressing the group the team announced that they'd almost not reached a decision that night, they had dropped the list to 6 people but had been unable to narrow it further. My heart jumped. With us all hanging on every word, the team announced that they'd made a change in plans and had decided to expand another 2 slots as "next on deck" or alternates. These candidates would be given first dibs at any future opportunities, or expansions, within the PDFT but would not be considered 'the final four'. First Jens Thorgenson's name was called. I was immediately thrilled; Jens and I had started building a strong friendship and respect, and I thought he was a wonderful choice. Next they announced me and my heart raced - it was unexpected, but ultimately perfect for me. I was ecstatic! In a weird way, I felt like the pressure was off, but felt no sadness at not making the final four. I knew, no matter who was picked, it was going to be a good choice and the PDFT was going be stronger than ever. Before announcing the final four, Ian Bobo emotionally reminded everyone that the blue jerseys weren't an indication of self-worth, and that each person there was a great candidate. The words were sincere, and they rang true. Once the final four were announced, through tears of joy, and sadness, everyone took the opportunity to congratulate them. Looking around I realized this is what the week was all about - cheering your team on, and we were ALL a team. We all left the next day as better people, with a deeper respect for everyone there than any of us could have imagined. I often try to explain the experience to people, but realize that it falls short of doing the whole process justice. All I can say is that it changed me in a way I can't describe. I've had many people asking me what happens from here? What does "next on deck" mean? Honestly, I don't know where this is going, but I know it's going to be a hell of a ride.
 -
-
I just visited, and I can say that the people there are friendly as hell. It’s more like a club or family atmosphere. The DZO is really nice and helpful. You can see the ocean and coast line and the landing area is huge. You have to be really trying hard to hit an obstacle on landing. (Somehow one guy did find a hedge row to land in.) If I lived there or anywhere in the UK that would definitely be my home DZ. Great place, great people. 9.5 out of 10 the .5 deduction is for the English weather. What are you waiting for… go down there! Blue skies
-
Jumper made a low turn and died from injuries substained from the impact. Jumper was on holiday from England while at this Boogie. Jumper had spiralled below and behind 3 other canopies already on long finals, and was approaching a congested an
-
Non Christians.......Celebration of Christmas?
Deleted replied to markd_nscr986's topic in Speakers Corner
we have alot of "political correctness" bolloxs in the UK at the moment, local councils banning xmas trees because they may be offensive to a minority group. Well in my opinion F**k them, if they are offended by christmas (and i say christmas, birth of christ and all that) then they should not live in my country, the same goes for any other thing that may offend them.